Account Creation
Set up a FlyNumber account in a couple of minutes — with email and password, or with Google. Once your account is verified you'll land on the dashboard ready to add your first number.
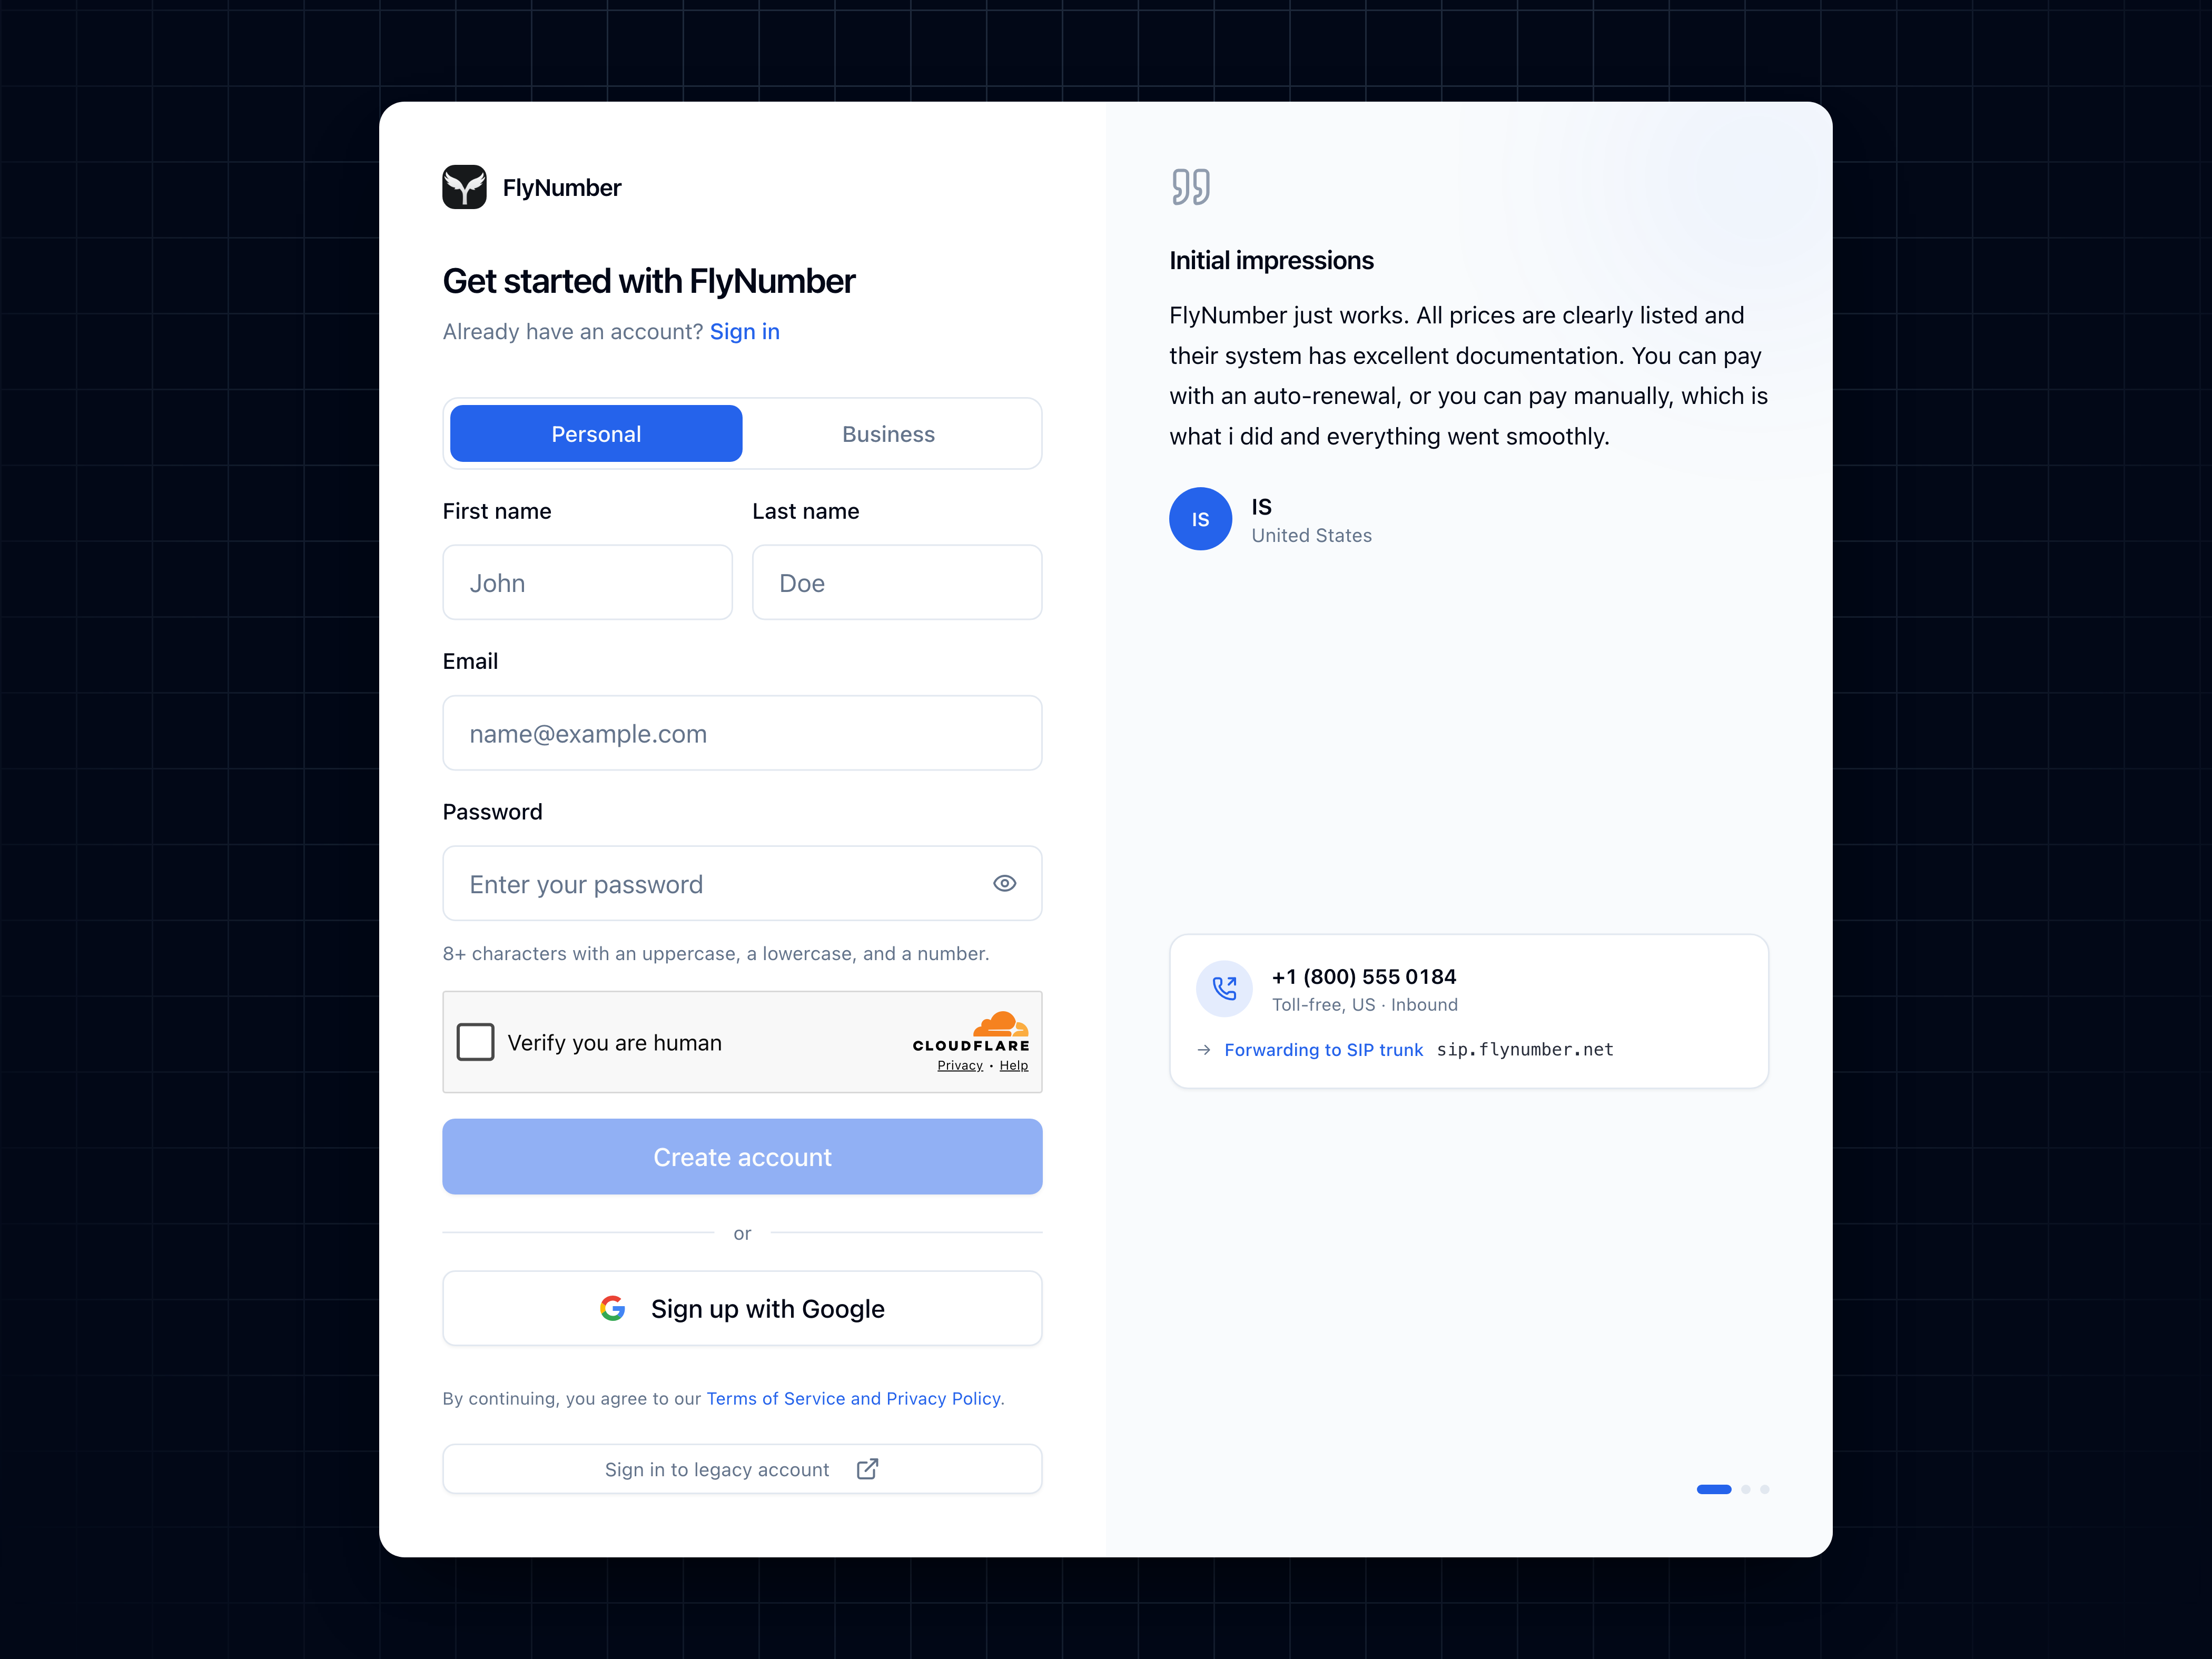
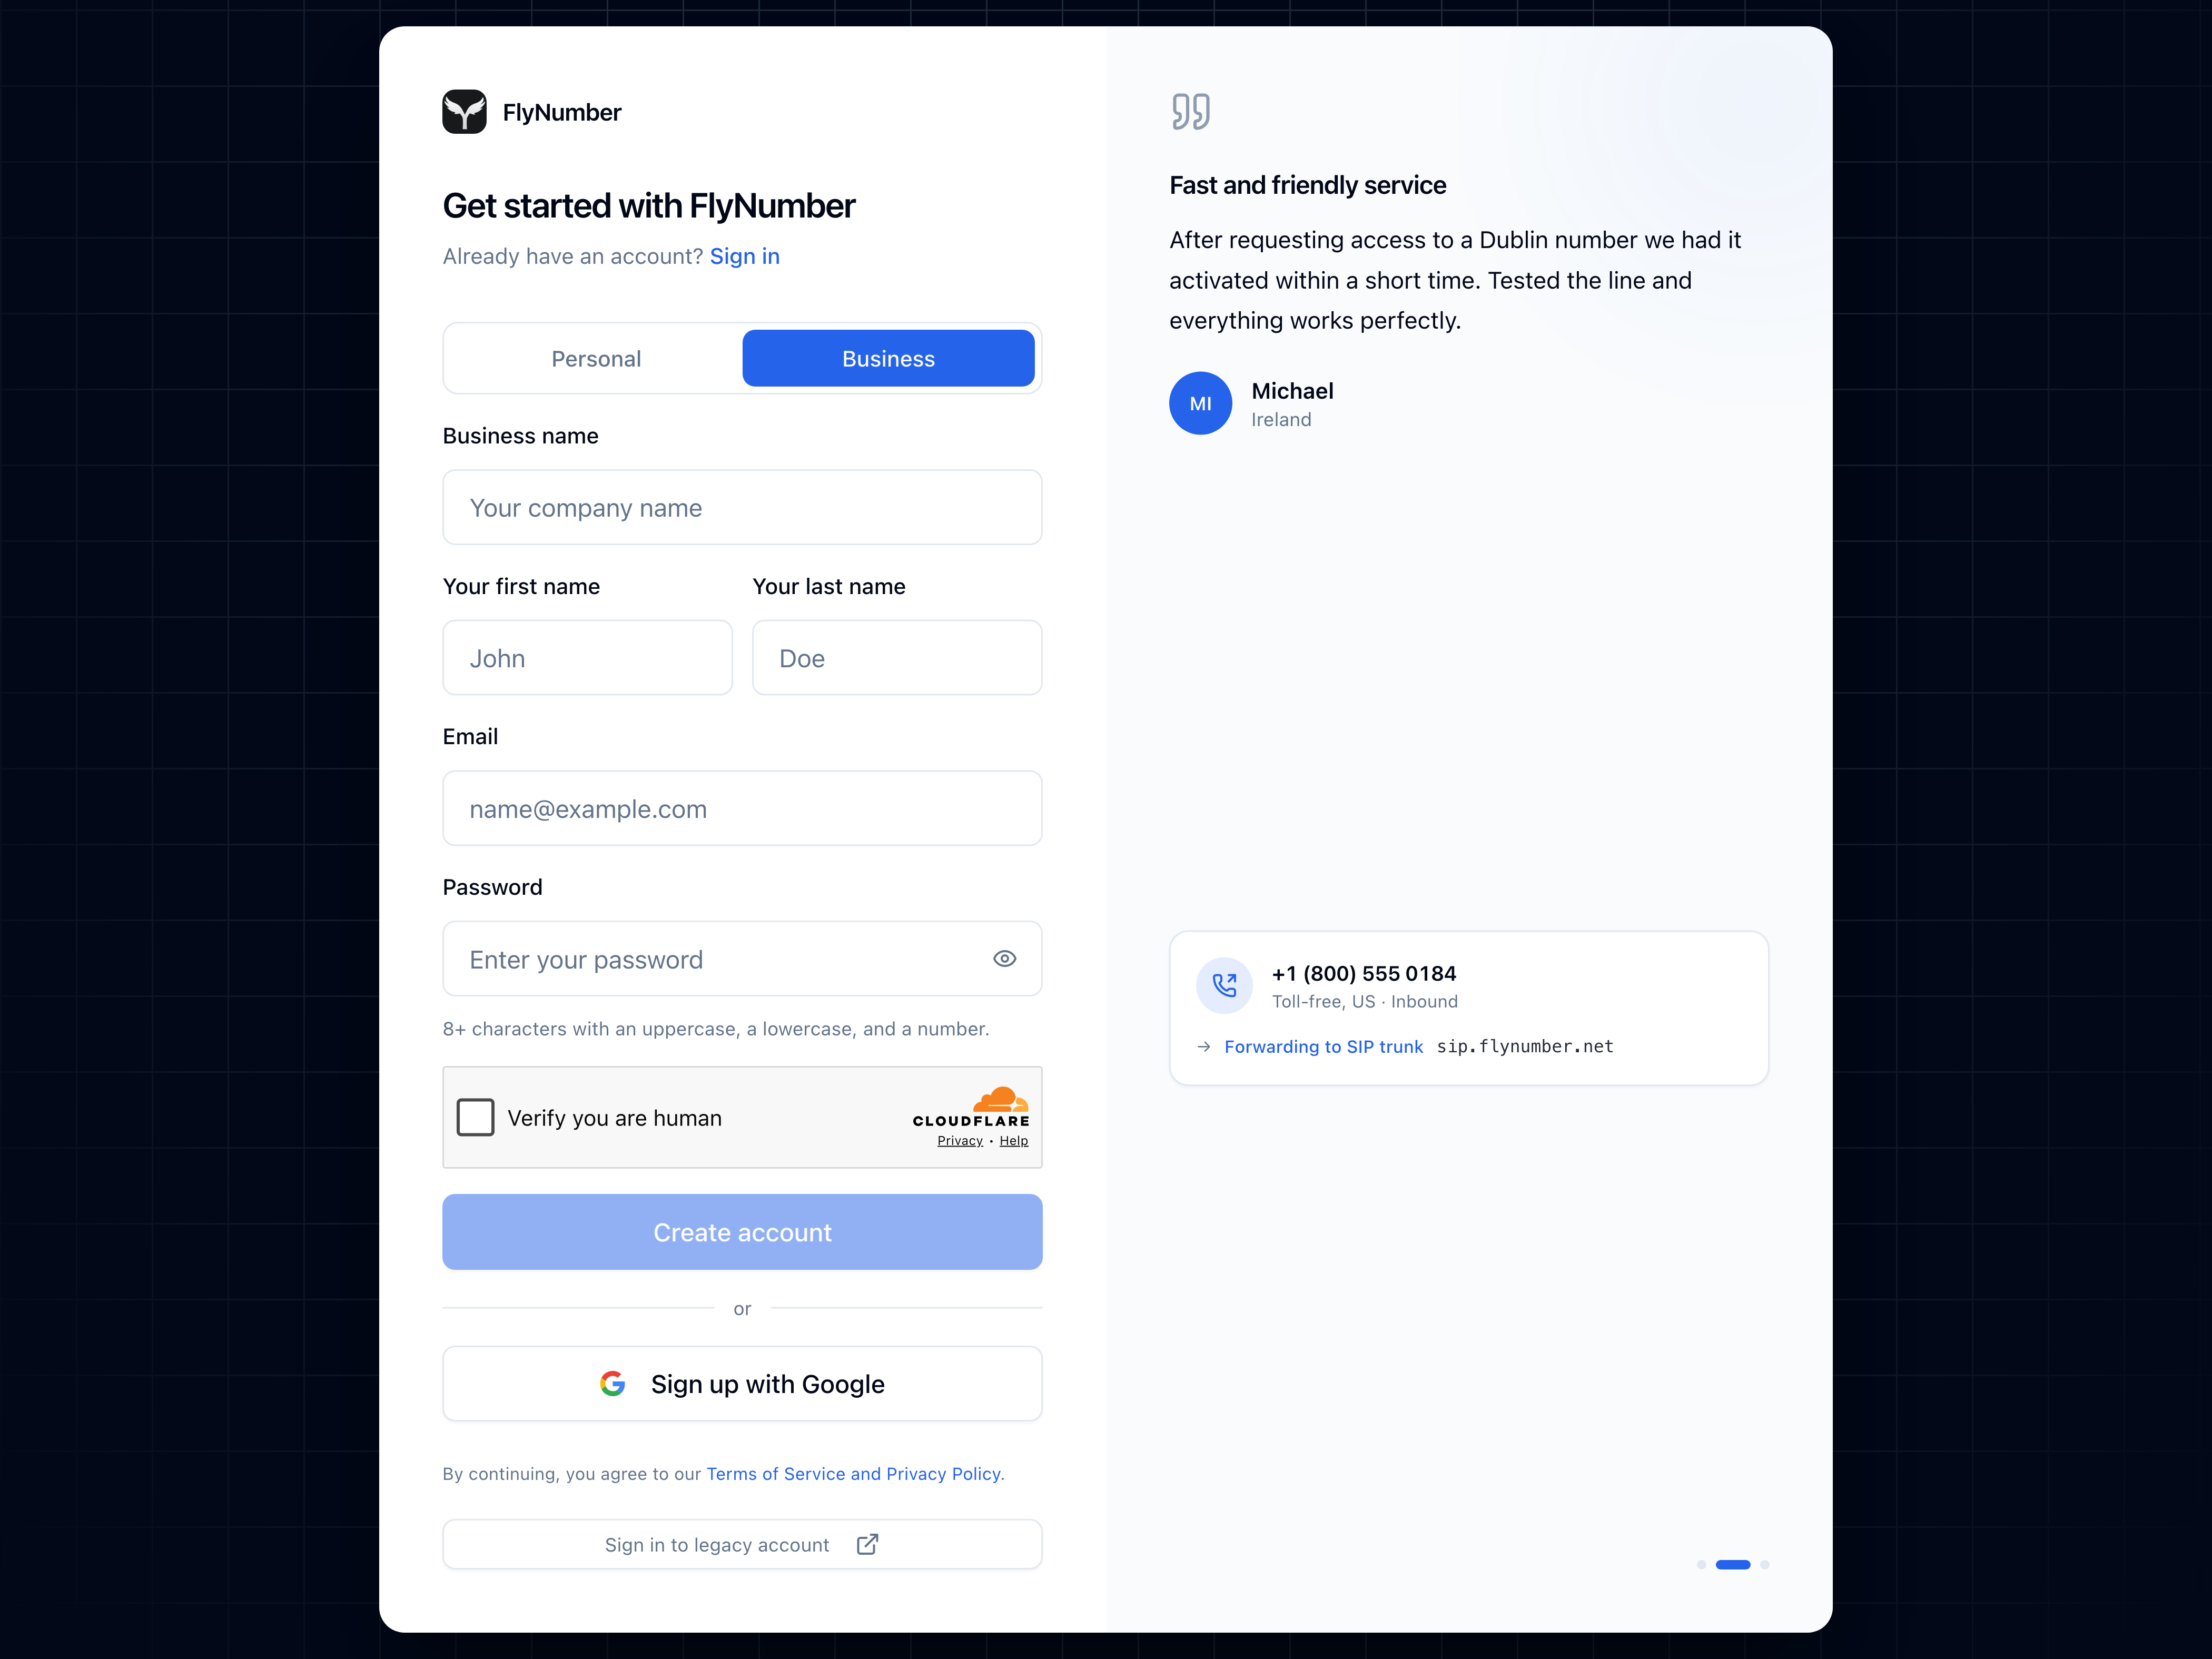
Sign up
Open panel.flynumber.com/login and click Create an account above the form.
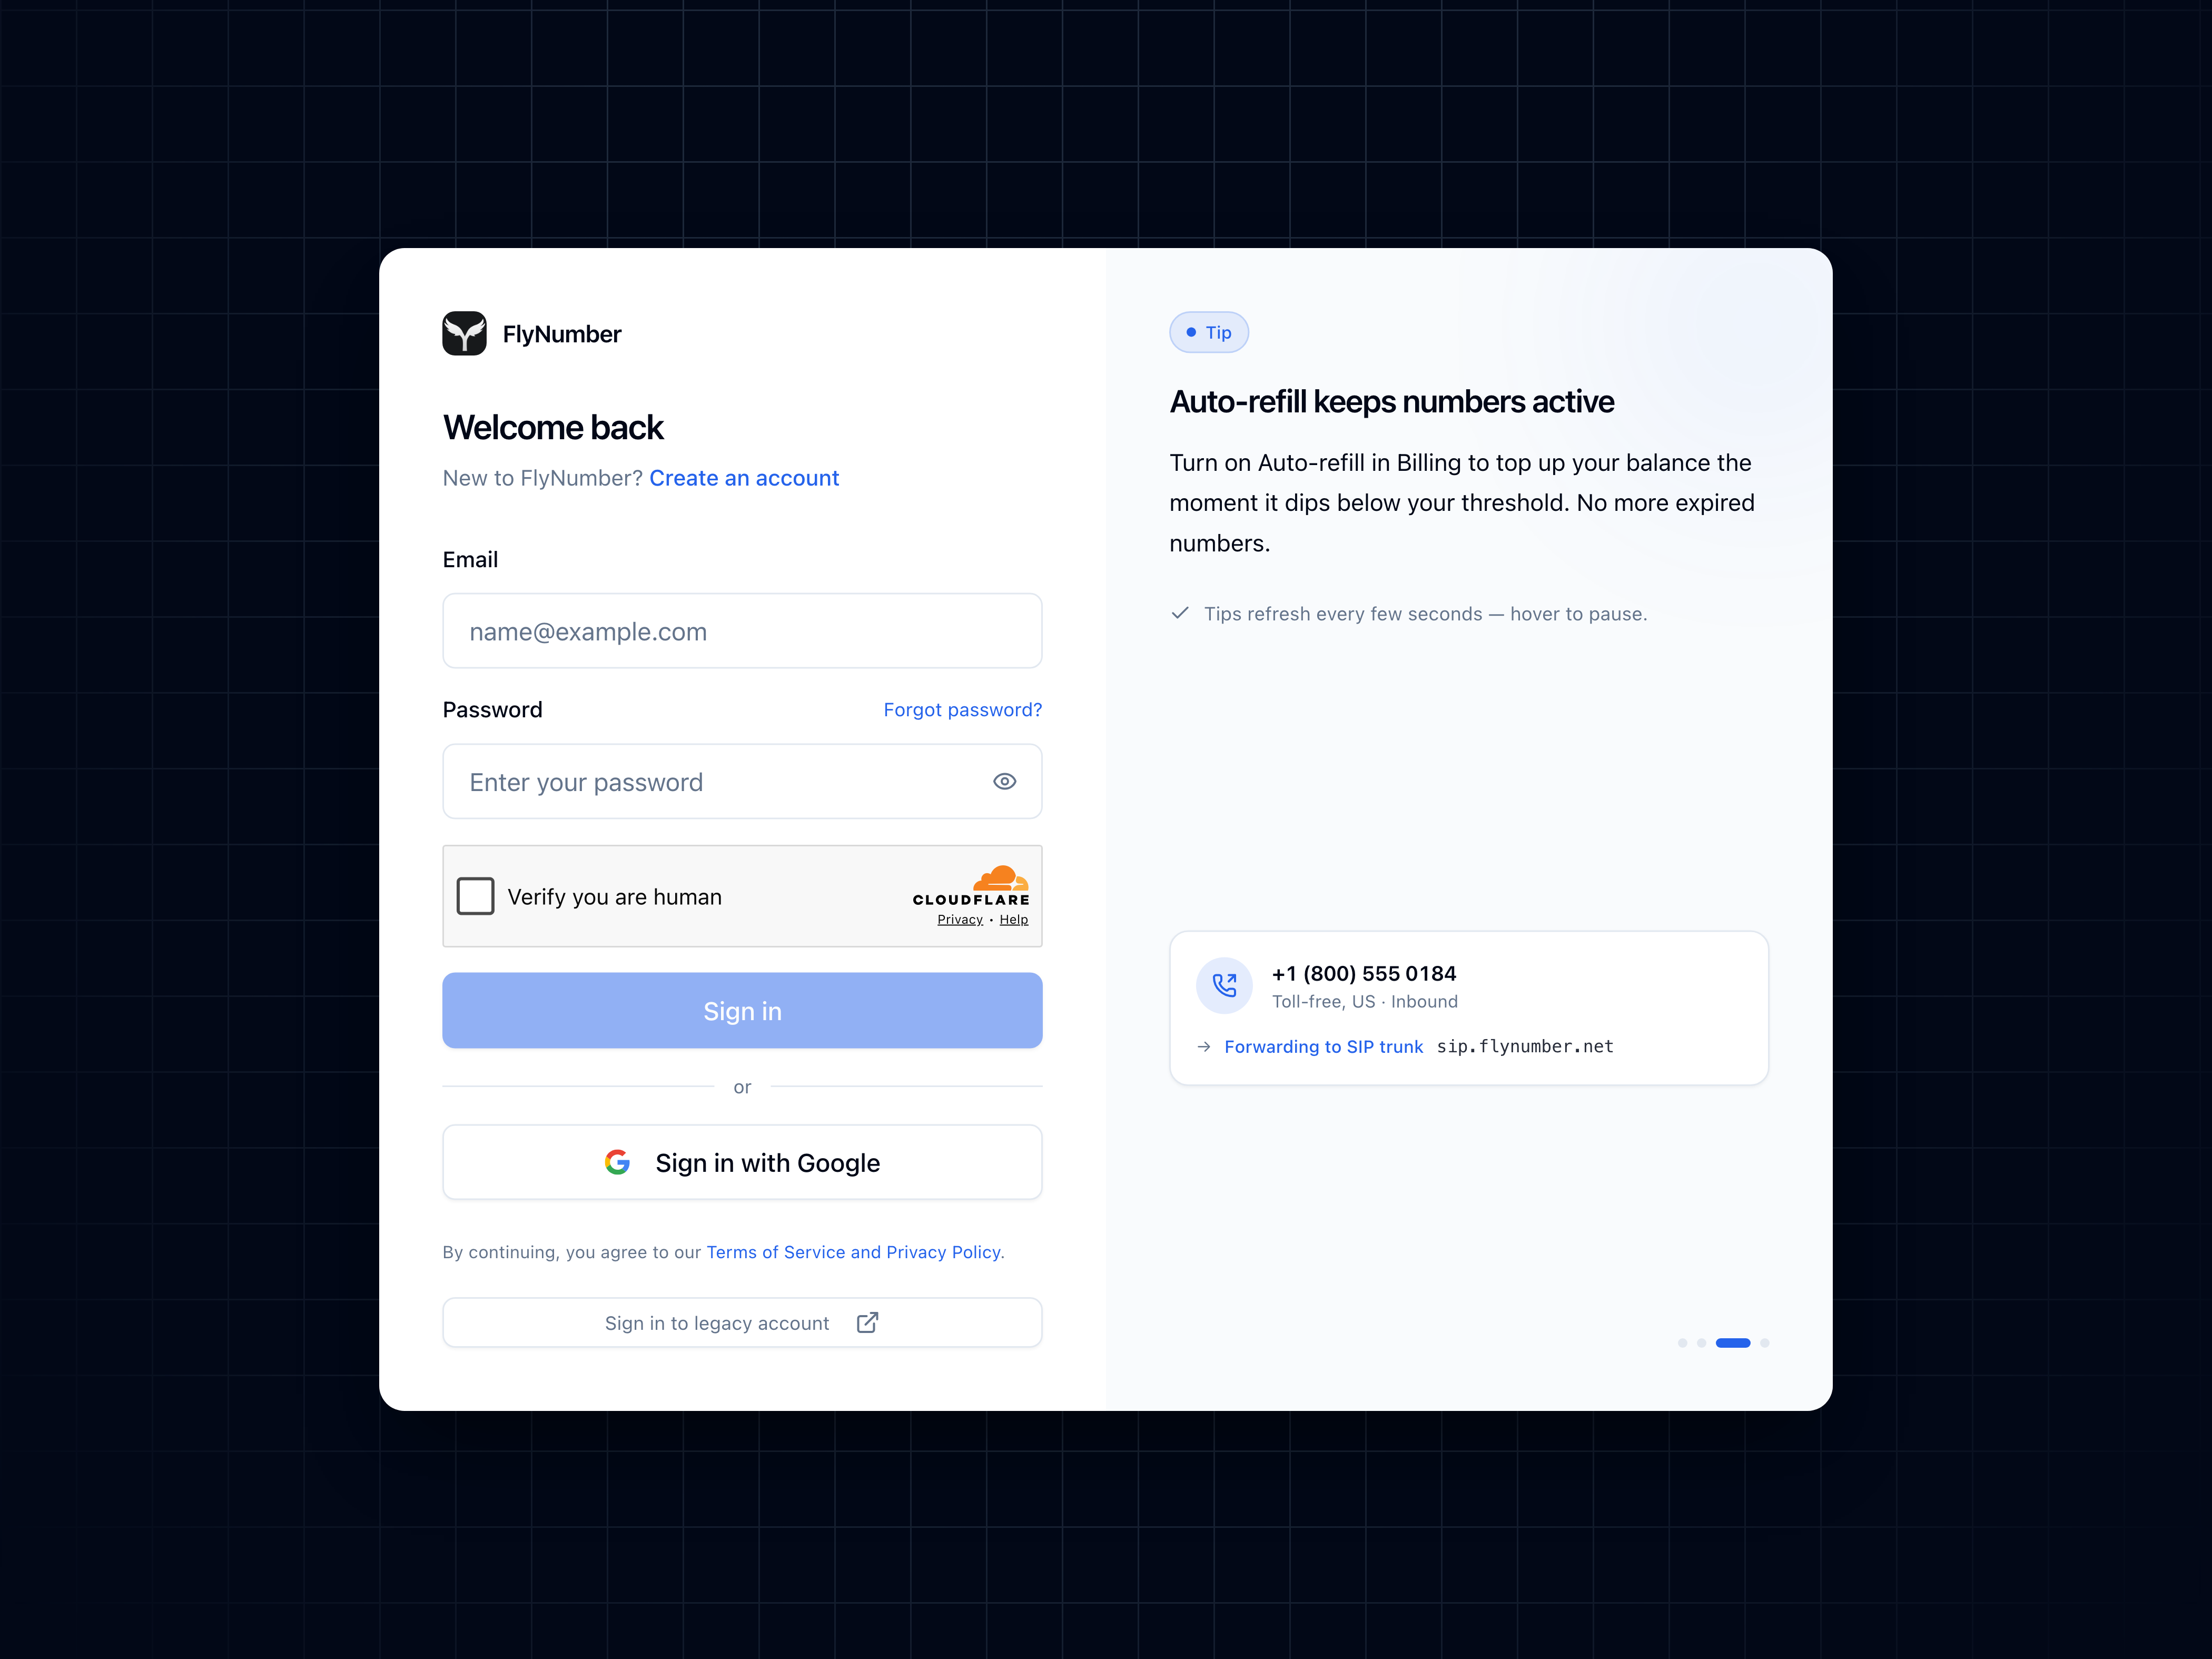
There are two ways to register:
- Email + password — enter your name, email, and a password (8+ characters, with at least one uppercase letter, one lowercase letter, and one number). We'll email you a verification link before your account becomes active.
- Google — click Sign up with Google and approve the OAuth prompt. No verification email needed.
Personal or Business
When you toggle to Create an account, pick the account type that fits. You can switch later from Profile Settings, so don't agonize over it.
Personal — for individual users. Just first name, last name, email, and password.
Business — for companies. Adds a Business name field on top of the personal details. Use this if you'll port numbers, run identity verification, or invoice under a company name.
Email verification
If you signed up with email, check your inbox for a confirmation link from auth.flynumber.com. Click it to activate your account, then head back to the panel to sign in. If you don't see the email after a few minutes, check spam, or use the Resend verification email option on the post-signup screen.
Google sign-ups skip this step — your account is active as soon as you approve the OAuth prompt.
Sign in
Returning users go to panel.flynumber.com/login and use either email + password or Sign in with Google. Forgot your password? Click Forgot password? above the password field and we'll email you a reset link.
If you previously used FlyNumber's older account system, you can still access it via the Sign in to legacy account link at the bottom of the login page during the transition period.
After you sign up
You'll land on the Dashboard. The most useful starting points:
- + Add FlyNumber — top right of the My FlyNumbers section, or via Add FlyNumber directly. Pick a country and area code to order your first number — browse coverage first if you want to check SMS support, registration requirements, or fax capability before ordering.
- Add Funds — in the top-right header. Seeds your prepaid balance so you can pay from balance instead of card on each order.
- User menu (avatar in the bottom-left of the sidebar) — opens Profile Settings, Notification Settings, and Number Registration.
Profile Settings
The Profile Settings page lives under your user menu. It's where you update account info, manage authentication, and review recent login activity.
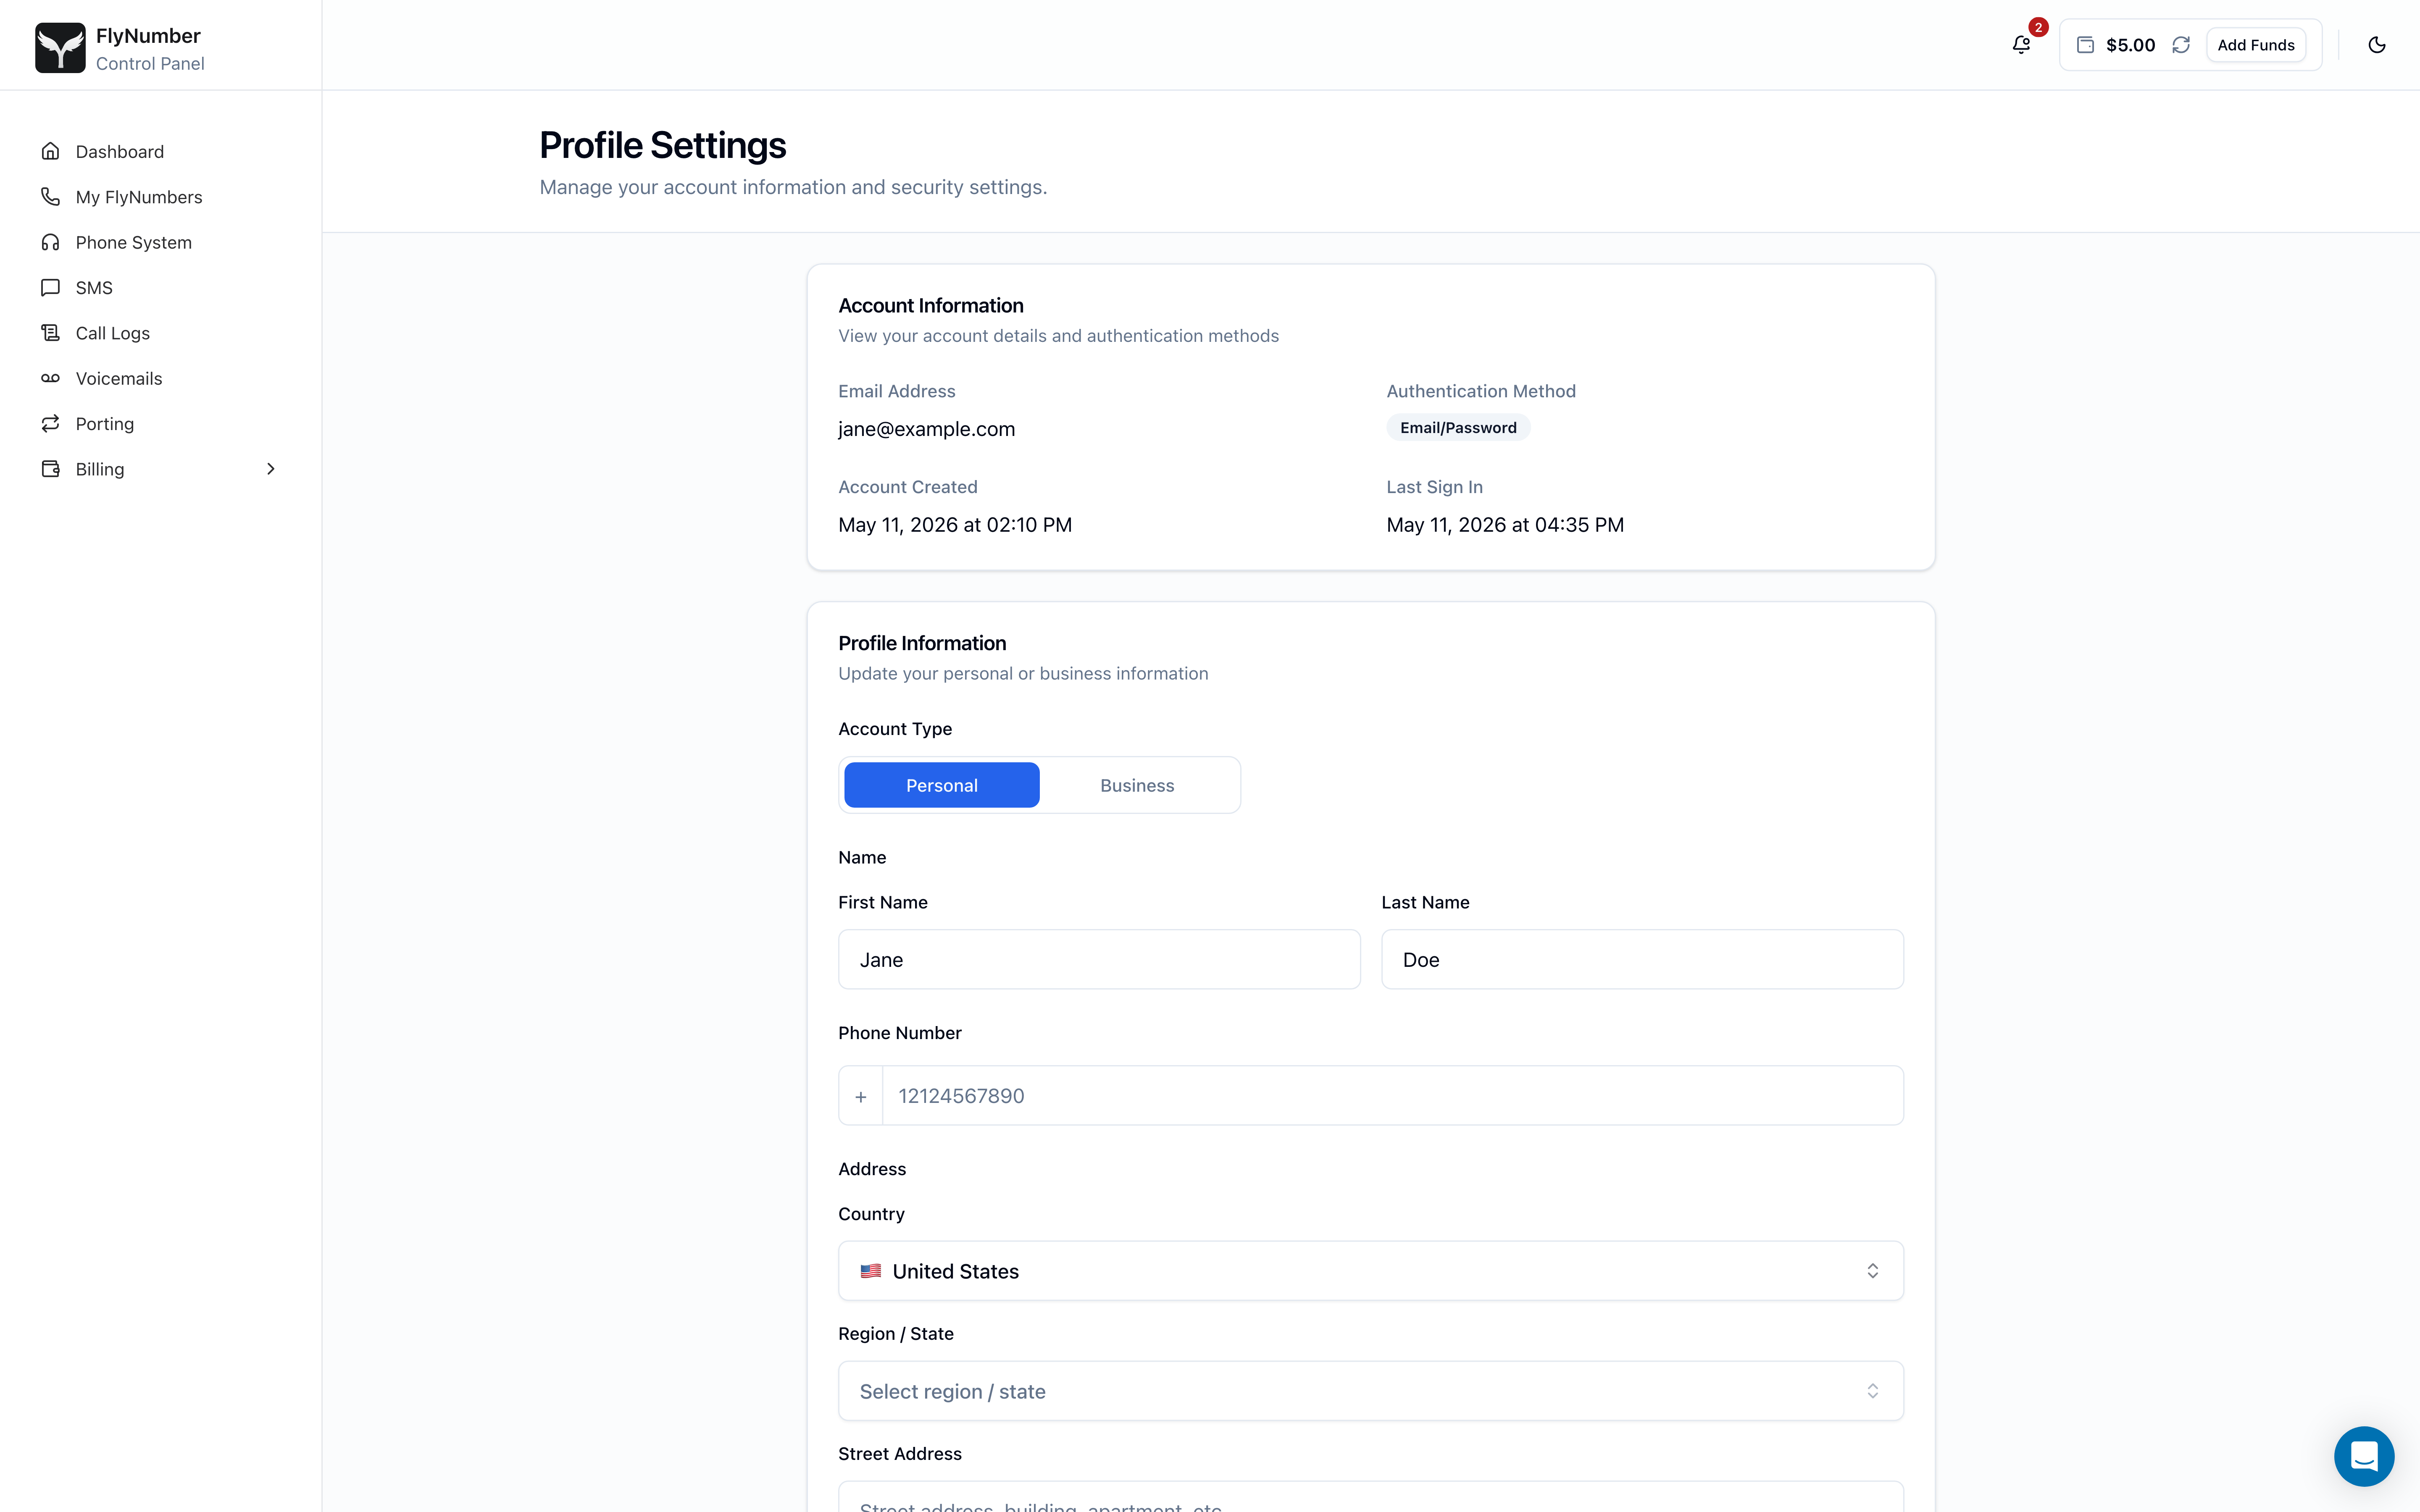
| Section | What's there |
|---|---|
| Account Information | Email, authentication method (email/password or Google), account creation date, last sign-in |
| Profile Information | Account type toggle (Personal / Business), name, phone number, billing address, optional VAT / Tax number |
| Security Settings | Change email or password — email changes require verification at the new address |
| Recent Login Activity | Your last five sign-ins with IP and browser, so you can spot anything you didn't do |
| Delete Account | Permanent deletion. Releases your numbers immediately and forfeits any prepaid balance. |
Next steps
- Add a FlyNumber — pick a country and area code from Add FlyNumber. Use coverage to filter by capability (SMS, fax, multi-channel) and check registration requirements per country.
- Read the call handling overview — decide whether to forward calls, route via VoIP, or set up the cloud phone system before you order. See call handling options.
- Tune billing preferences — charge a saved card on renewal, auto-refill your prepaid balance, or both. See the billing overview.
- Configure notifications — open Notification Settings from your user menu to pick which alerts (low balance, payment failures, verification updates) reach you by email and in-panel.
Need help? Check the FAQ or reach out via the Contact button in the sidebar.