The Panel
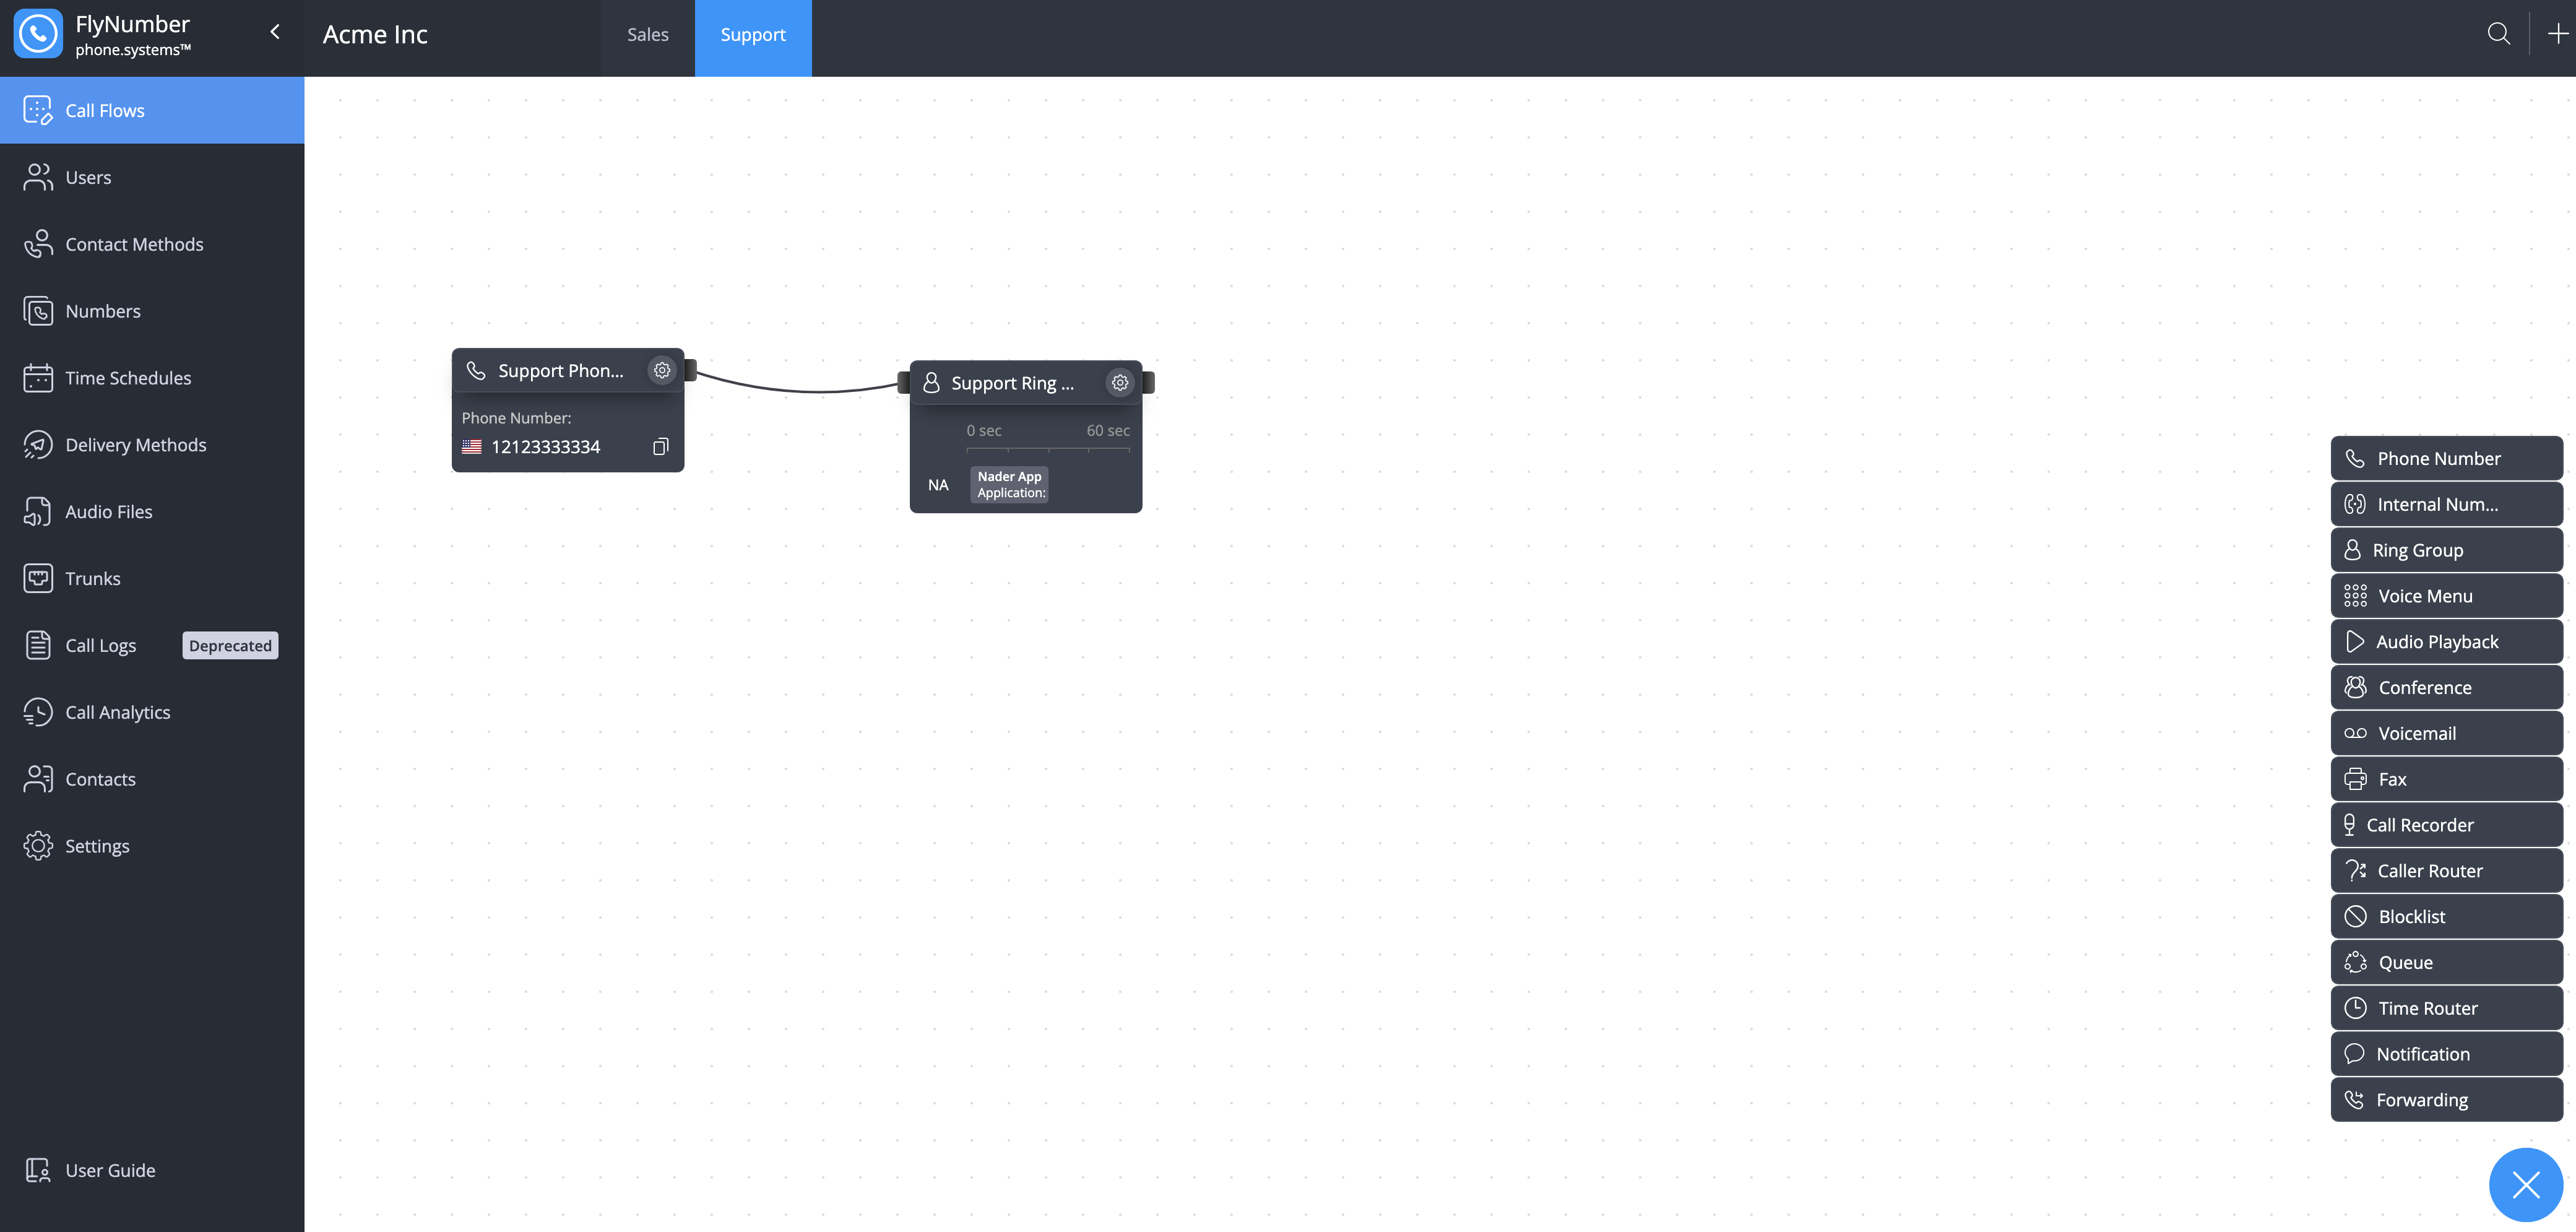
Think of the panel as your phone system's control center - a visual workspace where you can drag, drop, and connect different pieces to build exactly what you need. Whether you're setting up a simple voicemail or creating a complex call center, everything happens right here in this intuitive interface.
Any business use described in our docs applies to calls and voice features only. Outbound SMS on FlyNumber is a personal, person-to-person (P2P) service for individuals only — under carrier messaging rules it is not available to any business, organization, or entity, or to anyone texting on a business's behalf, even for one-to-one conversational messages. That is Application-to-Person (A2P) messaging and requires a registered campaign (e.g. 10DLC) through an A2P provider. Outbound SMS is disabled by default and enabled only after an account review. See SMS information.
For simpler setups, you can just set up a user and contact method from the main menu - no need to use modules.
While the panel will load on a smartphone fine, we suggest using a desktop to configure your call logic.
Main Components
| Component | Location | Purpose |
|---|---|---|
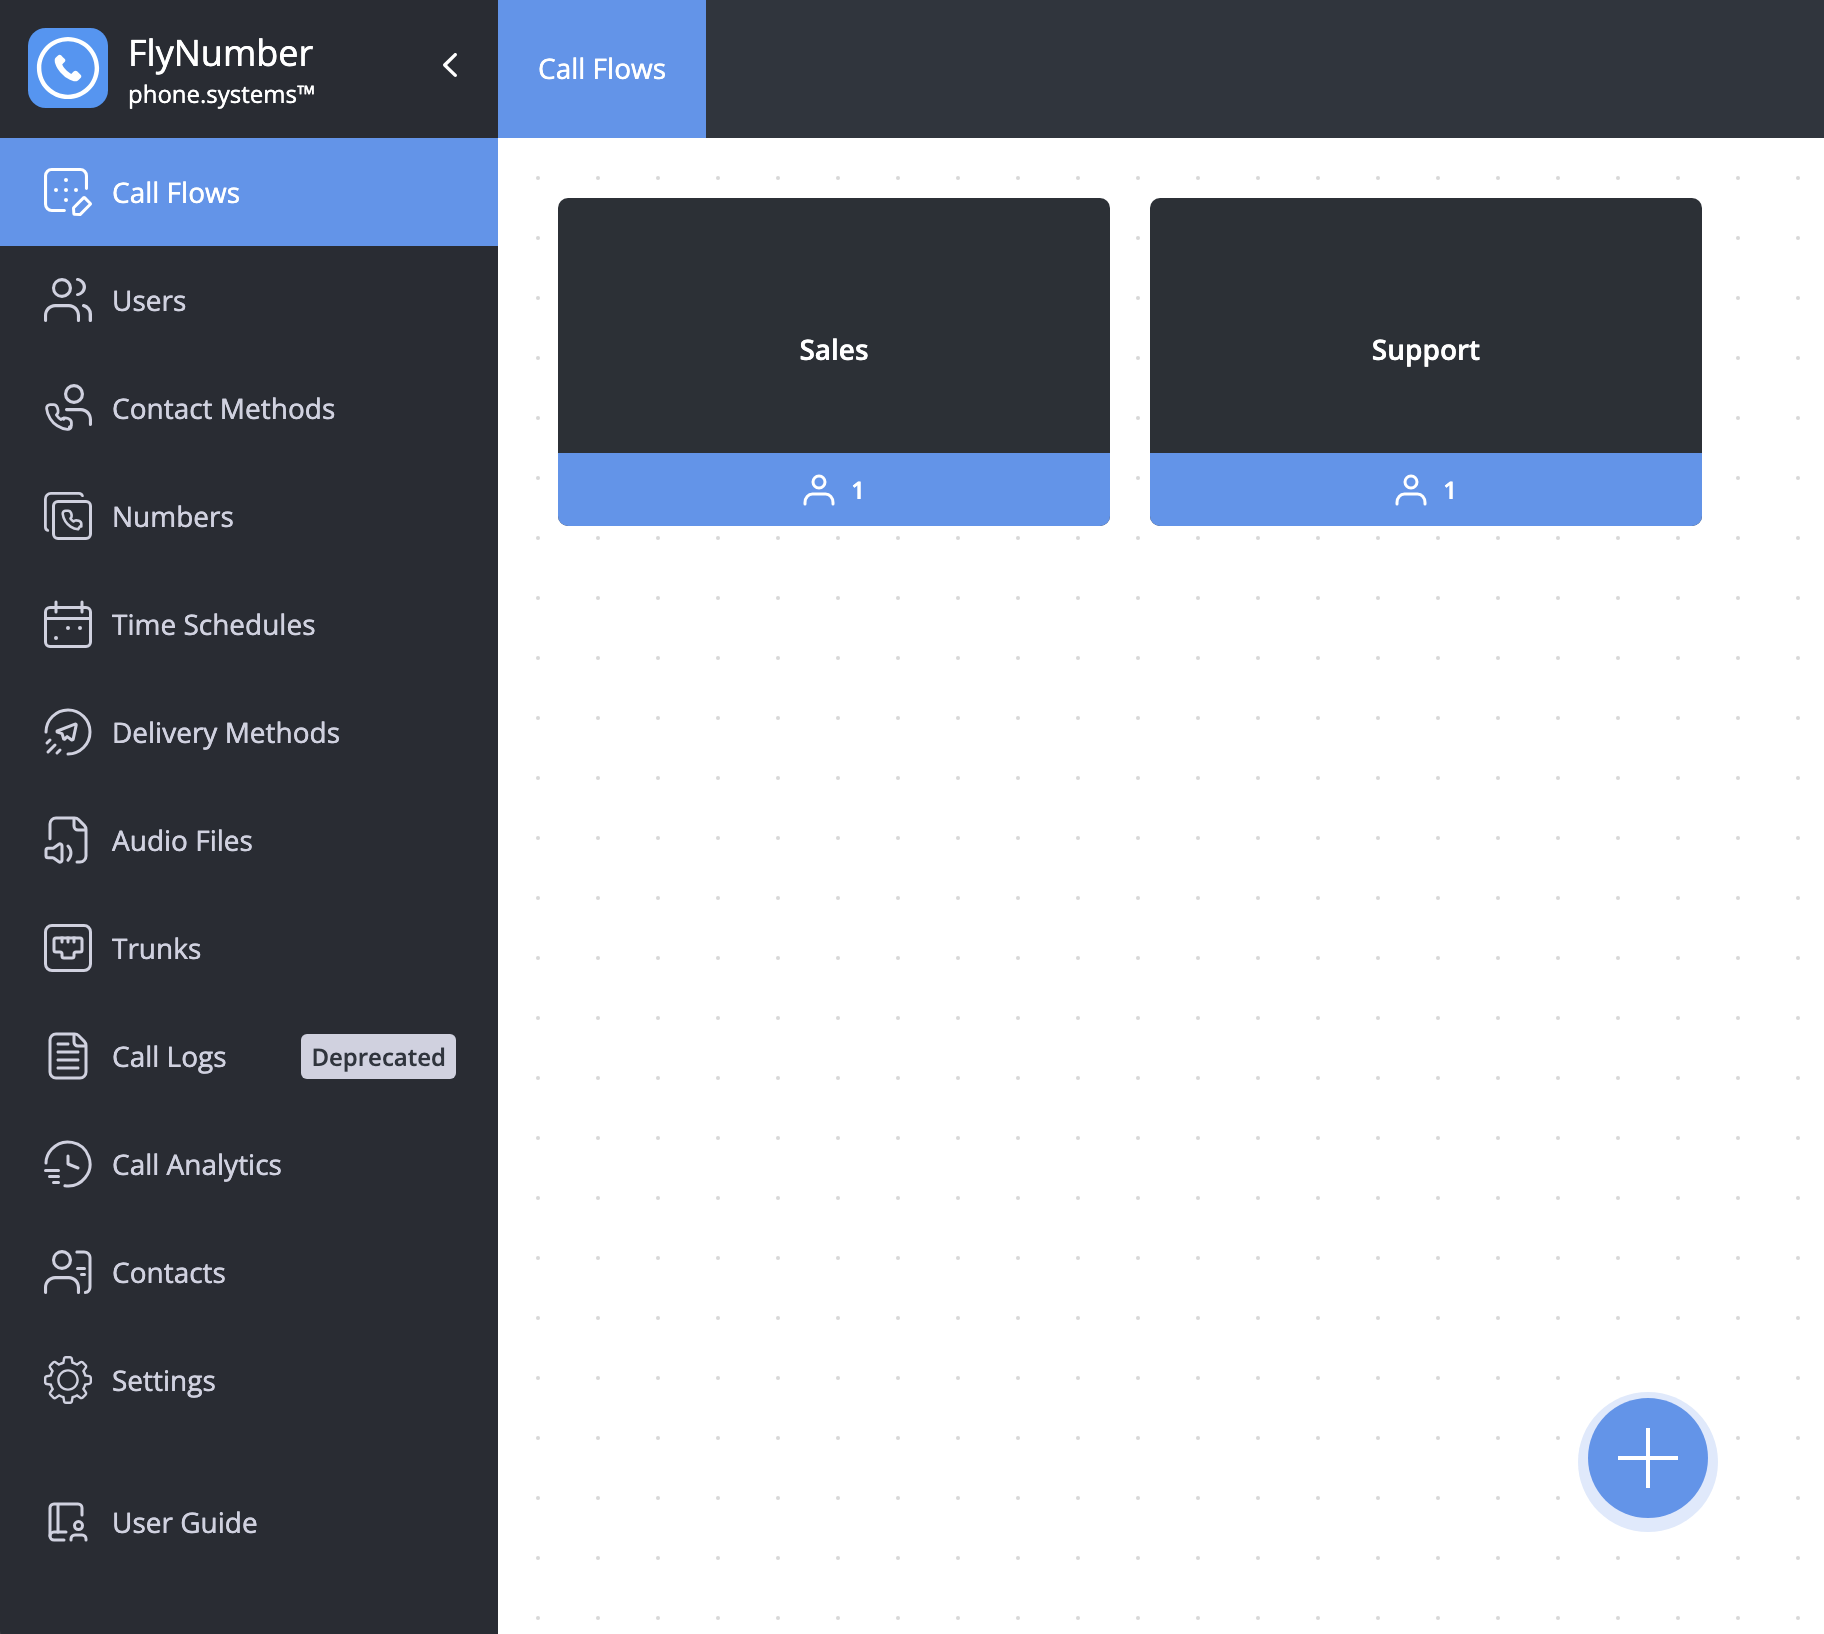
| Workspace | Center | The canvas where you build call flows by placing and connecting modules |
| Main Menu | Left side | Access system resources: users, contact methods, numbers, settings |
| Module Menu | Right side | Drag building blocks (voicemail, menus, routing, etc.) onto the workspace |
| Cables | Between modules | Connect modules to define how calls flow from one step to the next |
| Call Flows | Top left dropdown | Separate workspaces for managing different phone systems |
| Workspace Tabs | Top bar | Organize a single call flow across multiple pages |
| Trash Bin | Bottom right | Remove modules from the workspace |
Workspace
The workspace is the central canvas where you assemble your call flows. To build a flow:
- Drag modules from the Module Menu onto the workspace
- Position them where needed
- Configure each module using the settings dialog that appears automatically
- Connect modules using cables to create the call flow logic
You can reposition modules at any time by dragging them to new locations.
All required fields in the module configuration must be completed before saving the module to the workspace.
Main Menu
The Main Menu provides access to all core functions and settings:
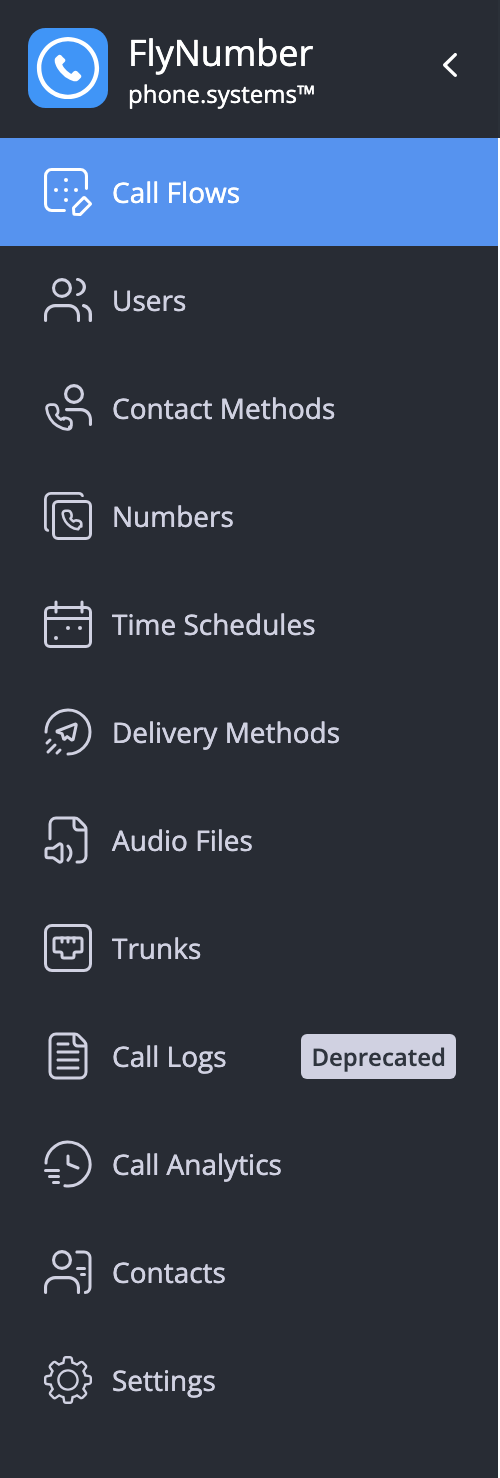
- Call Flows - Organize call routing based on departments or functions
- Users - Manage user accounts and app devices in the phone system interface
- Contact Methods - Configure SIP accounts, routing, and email settings
- Numbers - Manage phone numbers and internal extensions
- Time Schedules - Set up working hours for "Users"
- Delivery Methods - Configure delivery of voicemails and notifications via Email, Dropbox, FTP, SFTP, Google Drive, or OneDrive
- Audio Files - Manage audio recordings for greetings and music
- Settings - Access system-wide configurations and feature codes
Module Menu
The Module Menu contains all available modules for building call flows:
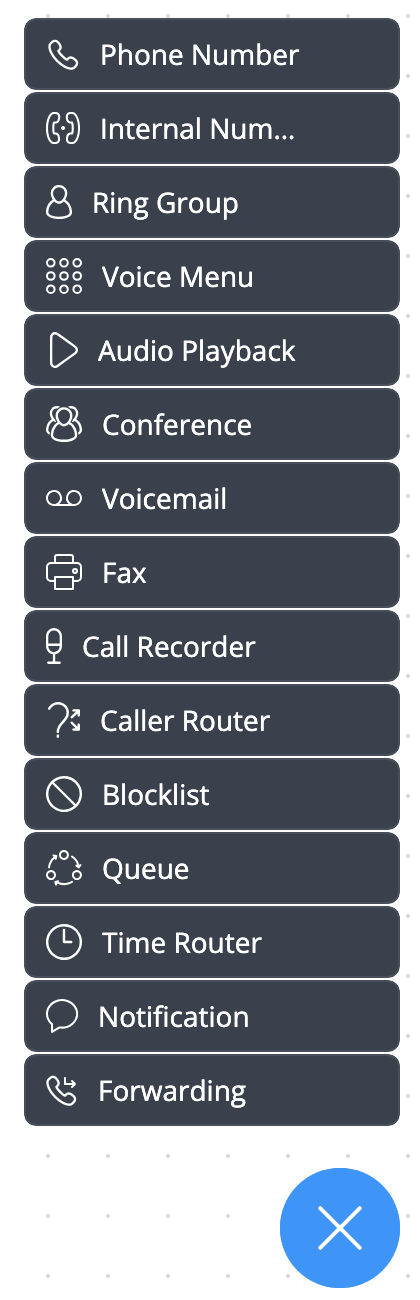
Available modules include:
- Phone Number
- Internal Number
- Ring Group
- Voice Menu
- Audio Playback
- Conference
- Voicemail
- Fax
- Call Recorder
- Caller Router
- Blocklist
- Queue
- Time Router
- Notification
- Forwarding
The Module Menu can be minimized by clicking the X icon in the bottom right corner. Click the + icon to expand it again.
Modules
Each module performs a specific function in your call flow. Modules connect to each other through sockets:
| Socket | Position | Purpose |
|---|---|---|
| Input | Left side | Receives calls from a previous module |
| Output | Right side | Sends calls to the next module |
Most modules have both sockets, but entry-point modules like Phone Number and Internal Number only have output sockets since they're where calls begin. When connecting modules, valid connection points highlight in blue.
Module Configuration
When you place a module on the workspace, a configuration dialog opens automatically. You must:
- Complete all required fields
- Click Save to add the module to your call flow
Duplicating Modules
To save time when creating similar configurations, you can duplicate existing modules:
- MacOS
- Windows
Hold the Option key while dragging a module
Hold the Ctrl key while dragging a module
The new module will retain all settings from the original.
Some modules, like Phone Number and Internal Number, cannot be duplicated since they require unique numbers
Selecting Multiple Modules
To select and move multiple modules:
- MacOS
- Windows
- Hold Command to select individual modules
- Hold Shift to select a connected group of modules
- Hold Ctrl to select individual modules
- Hold Shift to select a connected group of modules
Selected modules will show a blue border and can be:
- Moved together on the workspace
- Moved to another tab
- Deleted using the Trash Bin
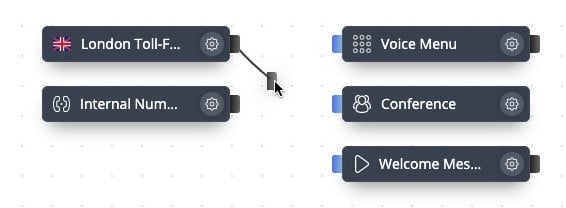
Cables
Cables create logical connections between modules to define call flows.
- Basic Connections
- Multiple Functions
- Yes/No Logic
- Removing Cables
- Troubleshooting
To connect modules:
- Hover over the right socket of the source module
- Click and drag to create a cable
- Connect it to the left socket of the destination module
When you start dragging, valid connection points will highlight in blue.
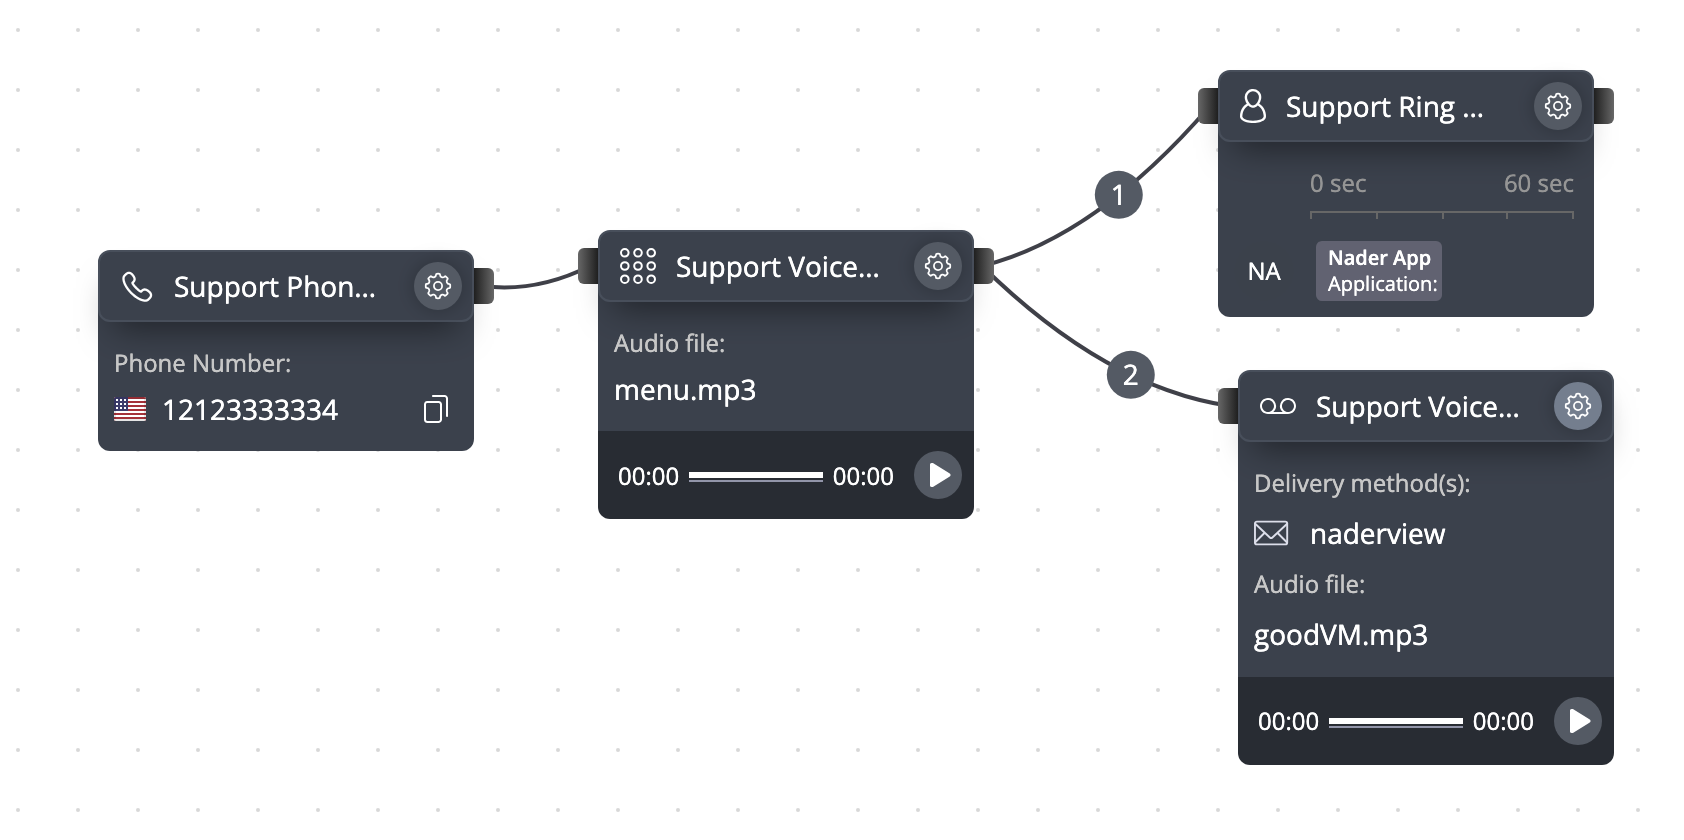
Some modules, like Voice Menu, can have multiple cables with different functions:
- Extension number routing
- Invalid extension handling
- Timeout handling
When connecting these cables, a configuration window appears to set the specific function. For example below, when adding modules after the voice menu, you'll be prompted for the digit(s) a user would need to press to get said module.
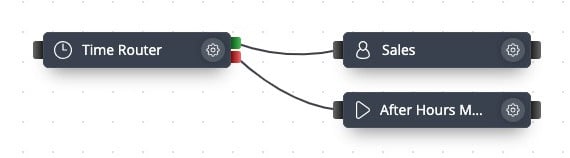
Modules like Time Router and Caller Router have two output sockets:
- Green socket (Yes): For successful condition matching
- Red socket (No): For condition matching failures
To remove a connection:

- Hover over the cable until the delete icon appears
- Click the delete icon
- Confirm the deletion in the popup dialog
When a module has no outgoing connection (no cable from its right socket), calls will end after that module's function is complete
Common connection issues and solutions:
- Can't connect modules? Make sure you're dragging from an output socket (right side) to an input socket (left side). Valid targets highlight in blue.
- Calls ending unexpectedly? Check that all modules have outgoing cables where needed. A module without an outgoing cable will end the call after completing its function.
- Wrong destination? Hover over the cable to see the delete icon, remove it, and create a new connection.
Call Flows
Call Flows are separate, independent phone system workspaces. Most users only need one (the default). You would create additional Call Flows if you manage completely separate phone systems from a single account—for example, different businesses.
- Call Flows = Separate phone systems (different numbers, different users)
- Workspace Tabs = Pages within a single Call Flow for visual organization (share the same numbers and users)
If you just want to organize a complex call flow visually, use workspace tabs instead of creating new Call Flows.
Creating a Call Flow
To create a new Call Flow:
- Click the + button in the bottom right
- Enter a name for the Call Flow
- Add users who will be part of this Call Flow
- Click Save
Managing Call Flows
You can quickly switch between Call Flows by clicking the Call Flow name at the top of the workspace.
To edit an existing Call Flow:
- Click the Actions button
- Select Edit
- Make your changes
- Click Save
To delete a Call Flow:
- Click the Actions button
- Select Delete
- Confirm the deletion
Once deleted, a Call Flow cannot be restored. All associated data and settings will be permanently lost
Workspace Tab Menu
Workspace tabs help organize complex call flows across multiple pages within a single Call Flow. This is useful when your routing logic has many branches that would clutter a single workspace view.
- Managing Tabs
- Moving Modules
- Connecting Across Tabs
To add a new tab:
- Click the + icon in the top right of the Workspace Tab Menu
- Enter a name for the new tab
- Click Save
To manage existing tabs:
- Hover over a tab to see the settings icon
- Click the settings icon to rename the tab
- Use the delete button to remove a tab (requires at least one other tab)
- Drag tabs horizontally to reorder them
Deleting a tab will remove all modules and configurations on that workspace page. Use caution when deleting tabs
You can move modules between different workspace tabs to organize your call flows better:
To move a module to a different tab:
- Drag the module over the destination tab
- Wait for the tab to activate (shown in blue)
- Continue dragging the module down into the workspace
- Release in the desired position
When moving a module that's connected to other modules, the connections will be maintained. A special icon will appear to indicate the connection spans across different tabs
You can connect modules that are on different workspace tabs:
- Start dragging a cable from a module's output socket
- Drag it over the destination tab
- Wait for the tab to activate
- Continue dragging to the target module's input socket
- Release to create the connection
The connection between modules on different tabs will be shown with a special icon that you can click to quickly navigate between the connected tabs.
Instead of building everything on one tab and then moving modules around, it's often easier to:
- Create all needed workspace tabs first
- Build each section of your call flow on its appropriate tab
- Connect the sections together using cross-tab cables
Search
The search tool helps you find resources across your phone system:
- Click the magnifying glass icon in the Workspace tab menu
- Enter your search term
- Results will be grouped by resource type
For each search result, you can:
- Use the locate icon (🔍) to find the item in the workspace
- Use the settings icon (⚙️) to access the item's configuration
Trash Bin
The Trash Bin allows you to remove modules from the workspace:
- Drag a module toward the + or X icon in the bottom right corner
- The icon will change to a Trash Bin
- Drop the module on the Trash Bin to delete it
The Trash Bin does not have a recovery feature. Deleted items cannot be restored
You can also delete multiple selected modules by dragging them to the Trash Bin together
Relations
The Relations feature provides a comprehensive view of how various components in your phone system are interconnected. This powerful tool helps you visualize all connections between numbers, users, modules, and contact methods.
Accessing Relations
You can access Relations from multiple areas in the phone system:
- Numbers section: Click the action menu (three dots) next to any phone number or internal number, then select "Relations"
- Contact Methods: View relations for any contact method to see where it's used
- Modules: Check which numbers and other components interact with specific modules
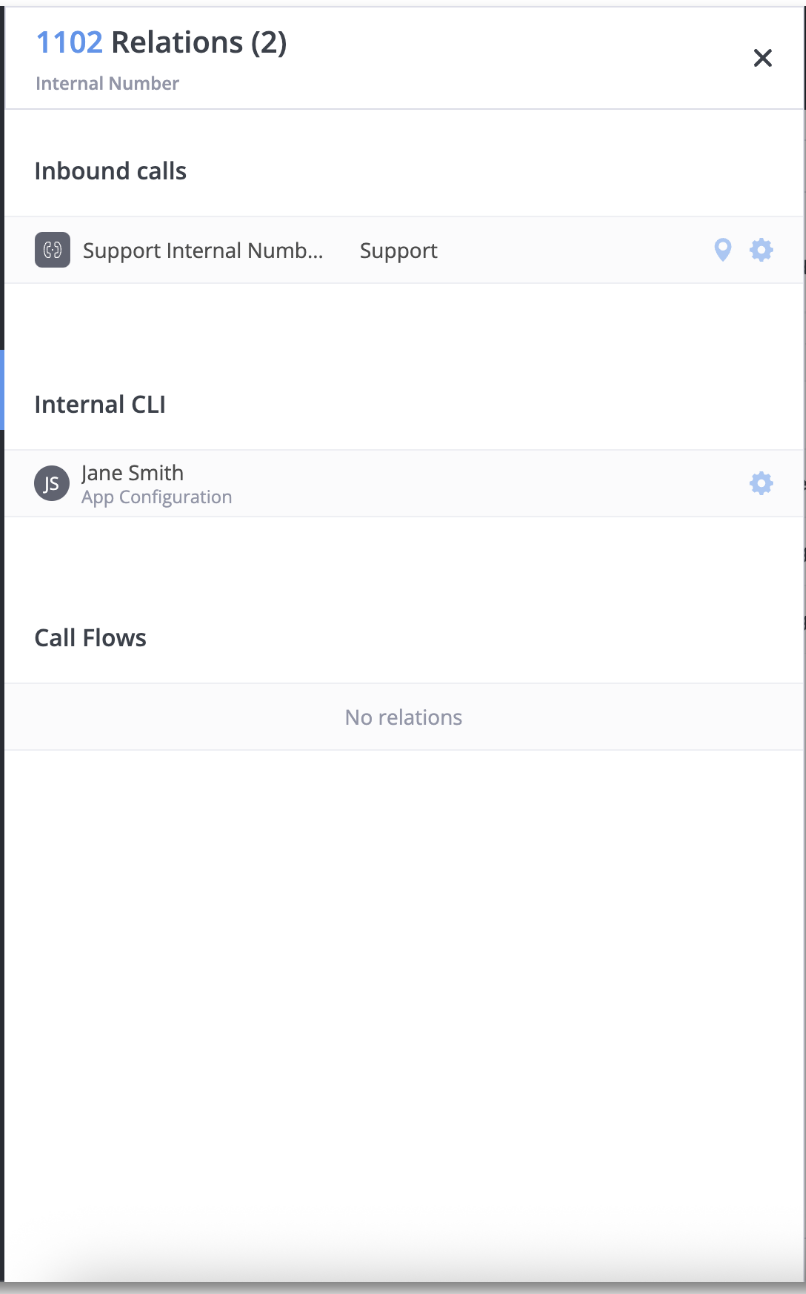
Understanding the Relations View
The Relations view organizes connections into logical categories:
Inbound Calls
This section shows which modules or contact methods will receive calls when this number is dialed:
- Displays linked modules (like Support Internal Number)
- Shows destination users or departments
- Reveals the complete inbound call path
Outbound CLI / Internal CLI
CLI (Calling Line Identity) shows how this number is used for outbound caller identification:
- User assignments
- App configurations
- SIP account settings
- This helps identify which users or apps use this number as their caller ID
Call Flows
This section displays all call flows that include or reference this component:
- Shows where the item is used in routing logic
- Provides links to relevant call flows
- May show "No relations" if not used in any call flows
Benefits of Using Relations
Relations offers several important advantages for phone system management:
- Troubleshooting: Quickly diagnose call routing issues by seeing the complete path
- System Mapping: Understand how different components connect together
- Change Management: Assess the impact of changes before making them
- Dependency Tracking: Identify which modules depend on specific numbers
Always check Relations before removing or changing a component's configuration to understand the potential impact on your call routing.