Trunks
Trunks let you connect your FlyNumber phone system to external VoIP providers for both incoming and outgoing calls. This gives you control over call routing, which providers handle your calls, and how caller information is displayed.
This feature is not enabled by default. Contact FlyNumber support to request activation for your account.
Quick Start
Most users need trunks for one of these scenarios. Jump to the one that fits your needs:
I want to route all outbound calls through my own VoIP provider
Steps:
- Go to Trunks > Termination Gateways and click +
- Enter your provider's details (host, username, password, port)
- Save the gateway
- Go to Trunks > Termination Routes and click +
- Create a route with:
- Name: "All Outbound"
- SRC Prefix: Leave empty
- DST Prefix: Leave empty
- Gateway: Select your new gateway
- Save and test with a call
This catch-all route sends all outbound calls through your provider.
I want to route calls to specific countries through a different provider
Steps:
- Create your termination gateway (if not already done)
- Go to Trunks > Termination Routes and click +
- Create a route with:
- Name: "UK Calls" (or relevant country)
- SRC Prefix: Leave empty
- DST Prefix: "+44" (UK country code, adjust as needed)
- Gateway: Select your gateway
- Save and test with a call to that country
Calls to numbers starting with +44 will use your gateway; others use the default.
I want to receive calls from another VoIP provider on my FlyNumber system
Steps:
- Go to Trunks > Inbound Trunks and click +
- Note the auto-generated domain (e.g.,
xxxxxxx.in.phone.systems) - Configure your external provider to forward calls to this domain
- If your provider requires registration, enable it and enter credentials
- Test by calling from your external provider
Your FlyNumber system will receive calls sent to the trunk's domain.
Overview
The Trunks interface has three sections:
| Section | Purpose |
|---|---|
| Inbound Trunks | Receive calls from external VoIP providers |
| Termination Gateways | Define connections to outbound VoIP providers |
| Termination Routes | Control which gateway handles which outbound calls |
Why Use Custom Trunks?
- Cost Control: Route calls through cheaper providers for specific destinations
- Provider Flexibility: Use multiple VoIP providers at once
- Number Portability: Keep numbers with other providers while using FlyNumber features
- Redundancy: Set up backup call paths
- Custom Routing: Route based on caller ID, destination, or both
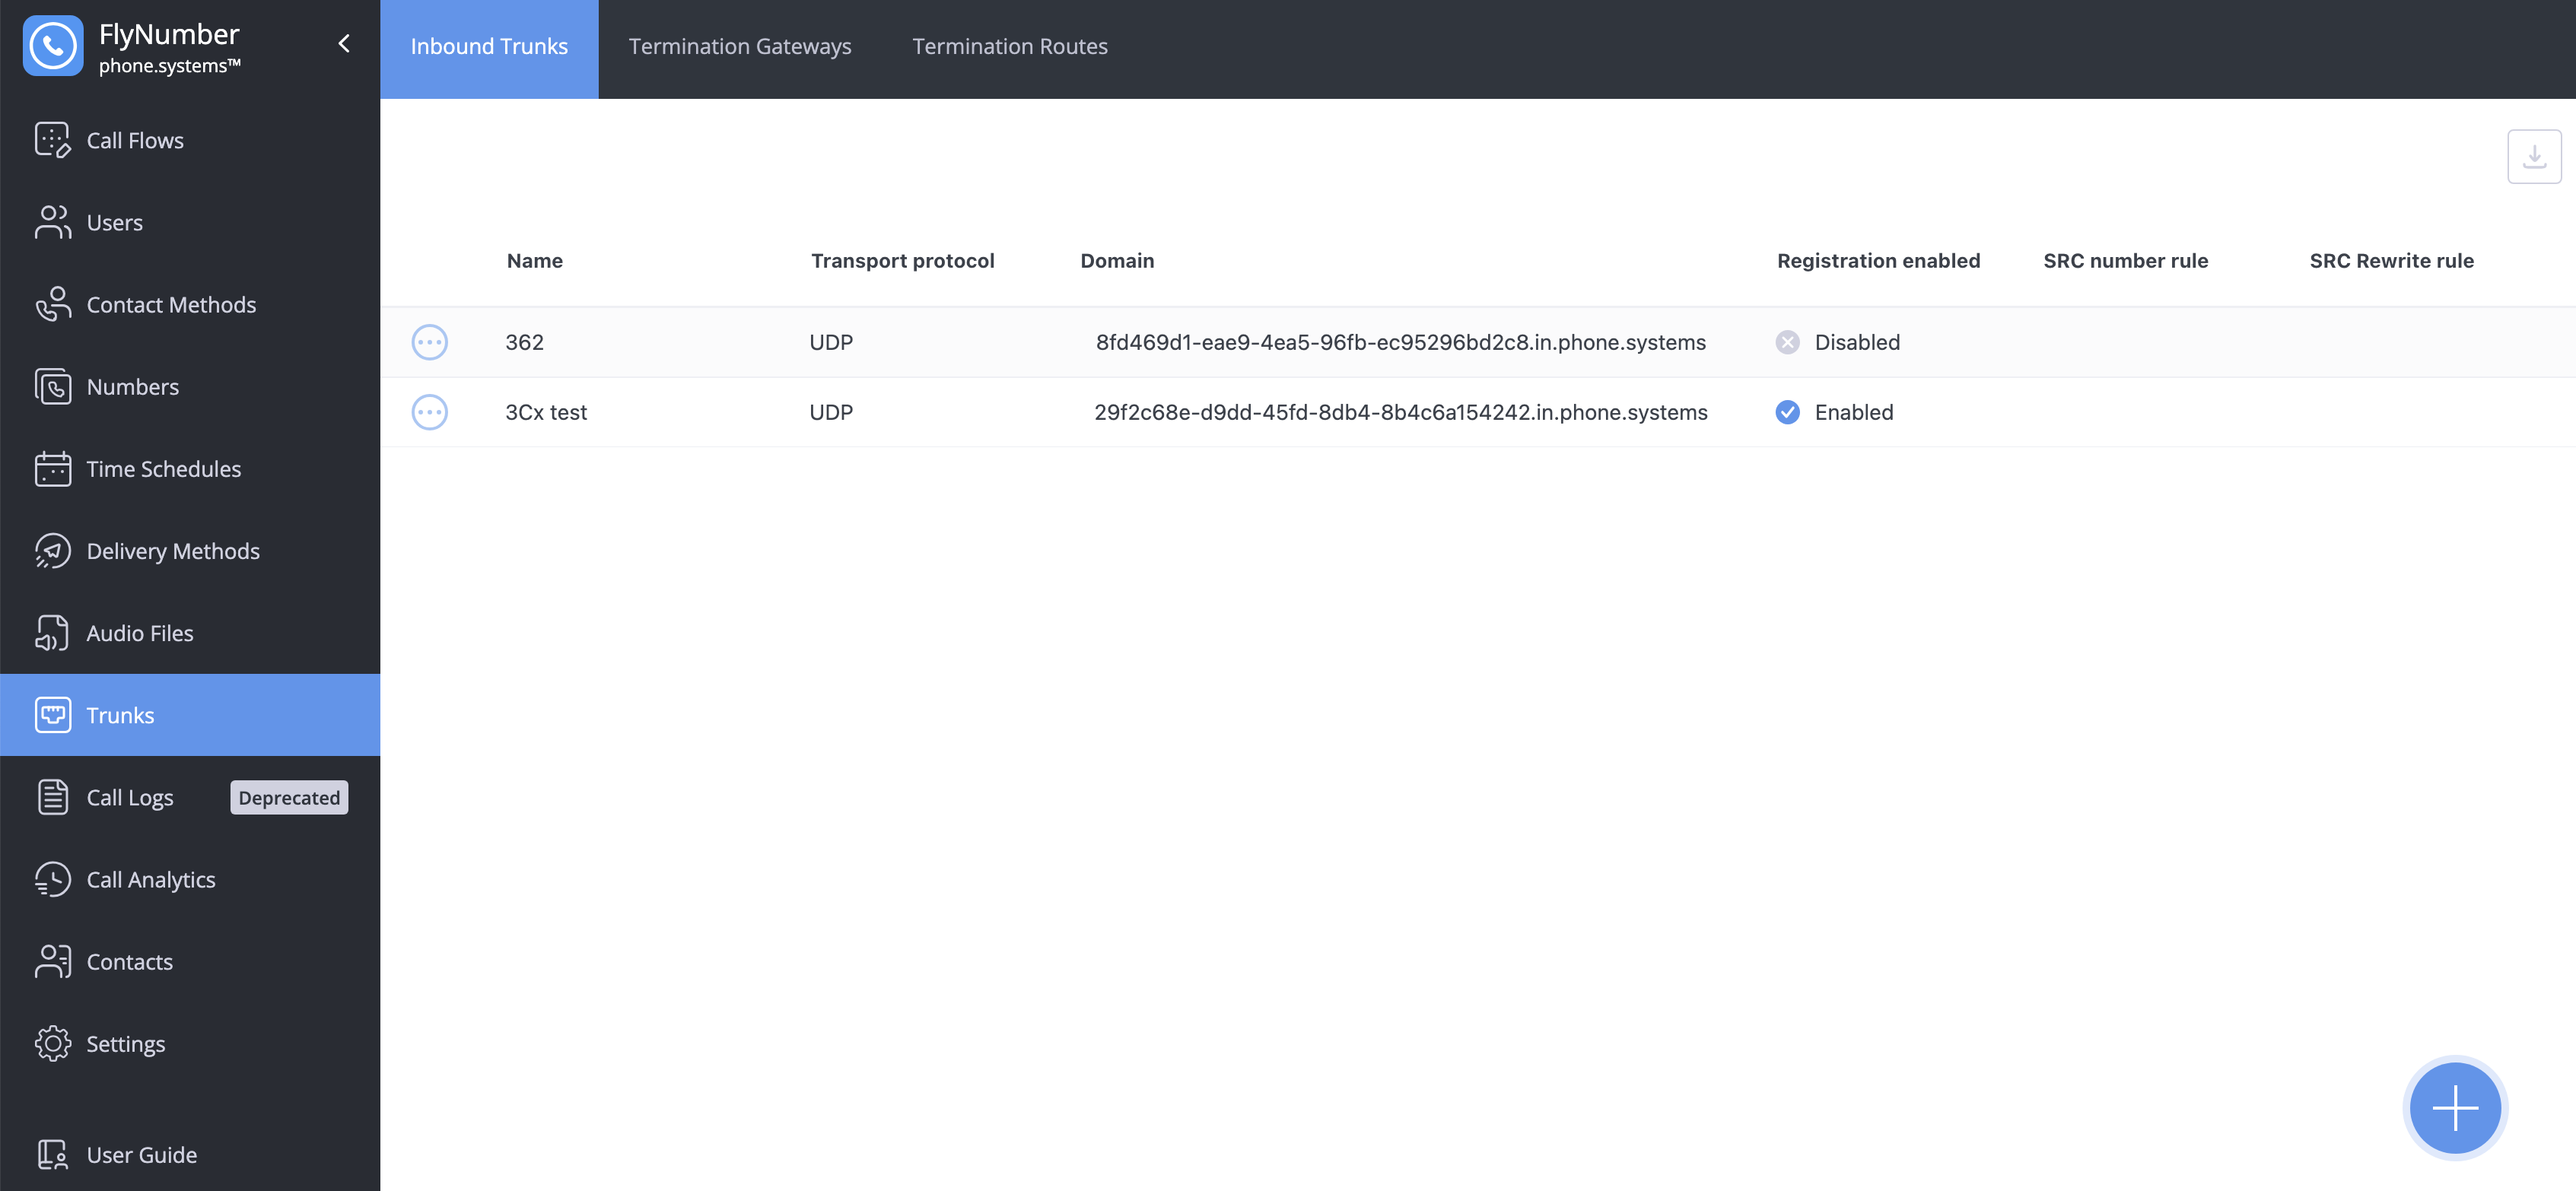
Inbound Trunks
Inbound trunks let you receive calls from external VoIP providers. Useful when you have phone numbers with other providers that you want to route through your FlyNumber system.
Creating an Inbound Trunk
- Navigate to Trunks > Inbound Trunks
- Click the + button
- Configure settings:
| Setting | Description |
|---|---|
| Domain | Auto-generated (e.g., xxxxxxx.in.phone.systems) — give this to your provider |
| Name | Friendly name (e.g., "External Provider Trunk") |
| Transport Protocol | UDP (most common) or TCP |
| Lookup Destination By | How to route calls (typically "R-URI username part") |
| Allowed Codecs | Audio formats to accept |
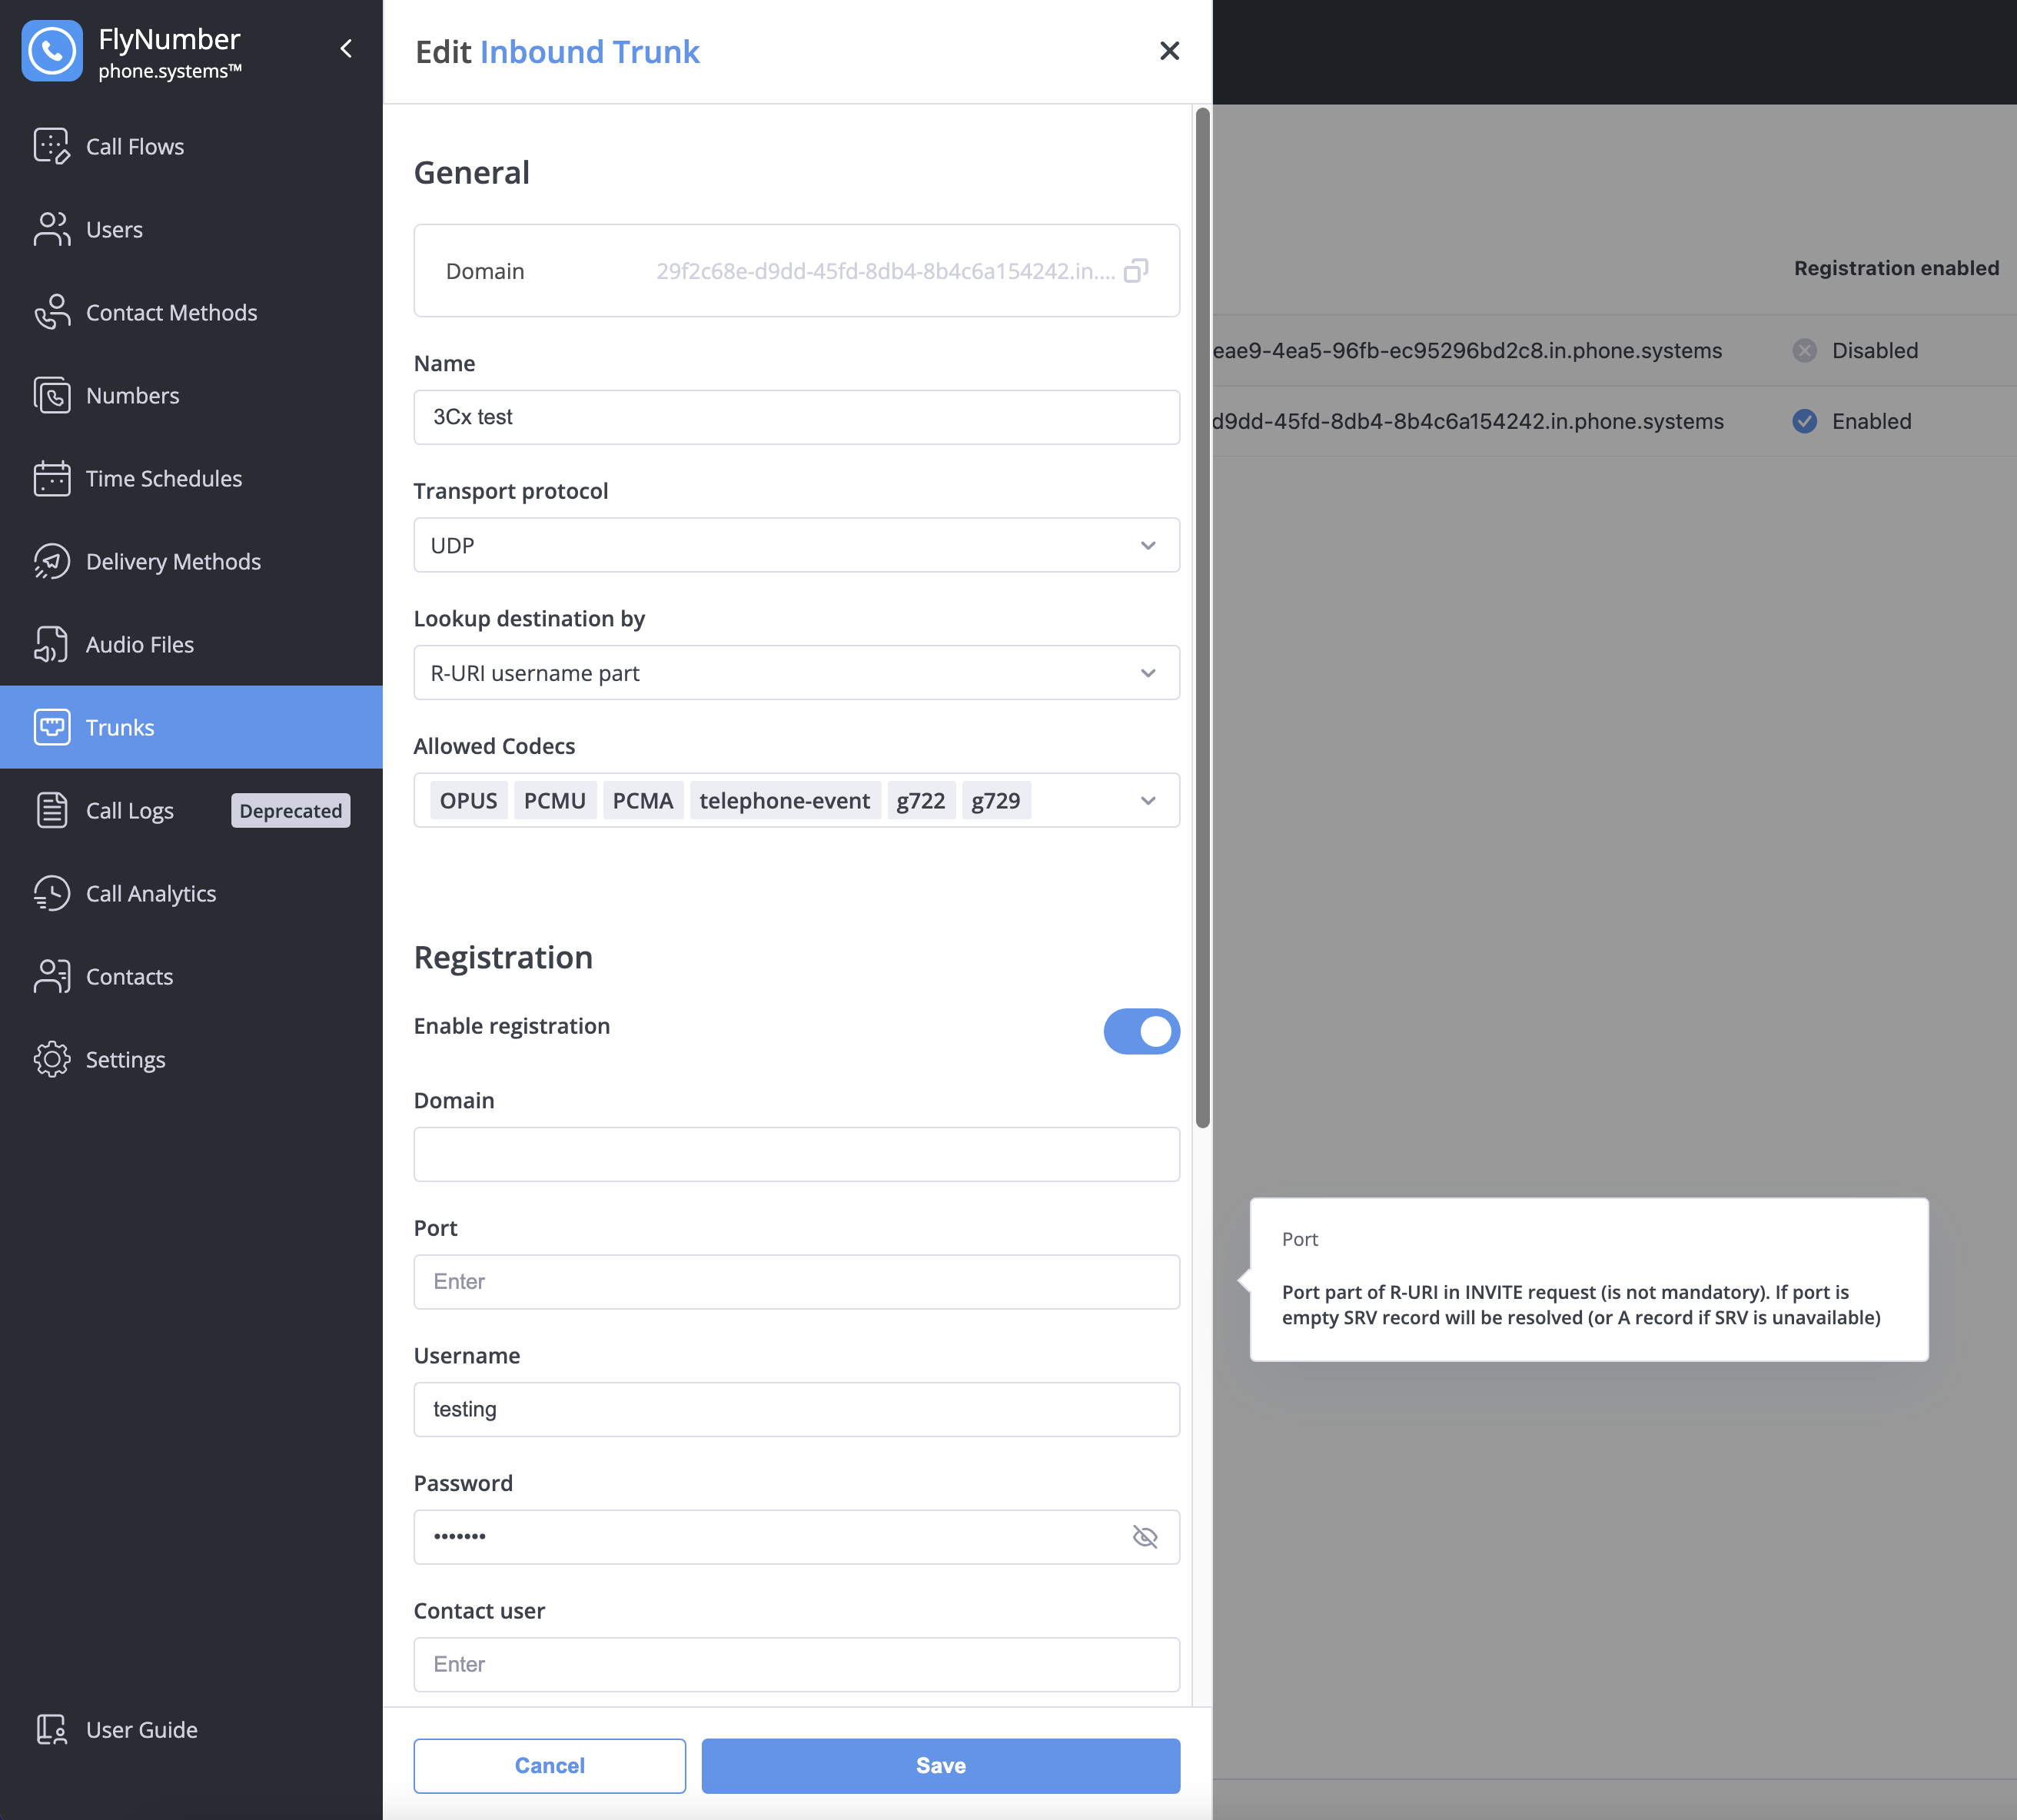
Registration (If Required)
Some providers require your trunk to register with them:
- Toggle Enable registration to ON
- Enter:
- Domain: Your provider's SIP domain
- Port: Usually 5060
- Username and Password: From your provider
- Contact user: Optional identifier
CLI Rules
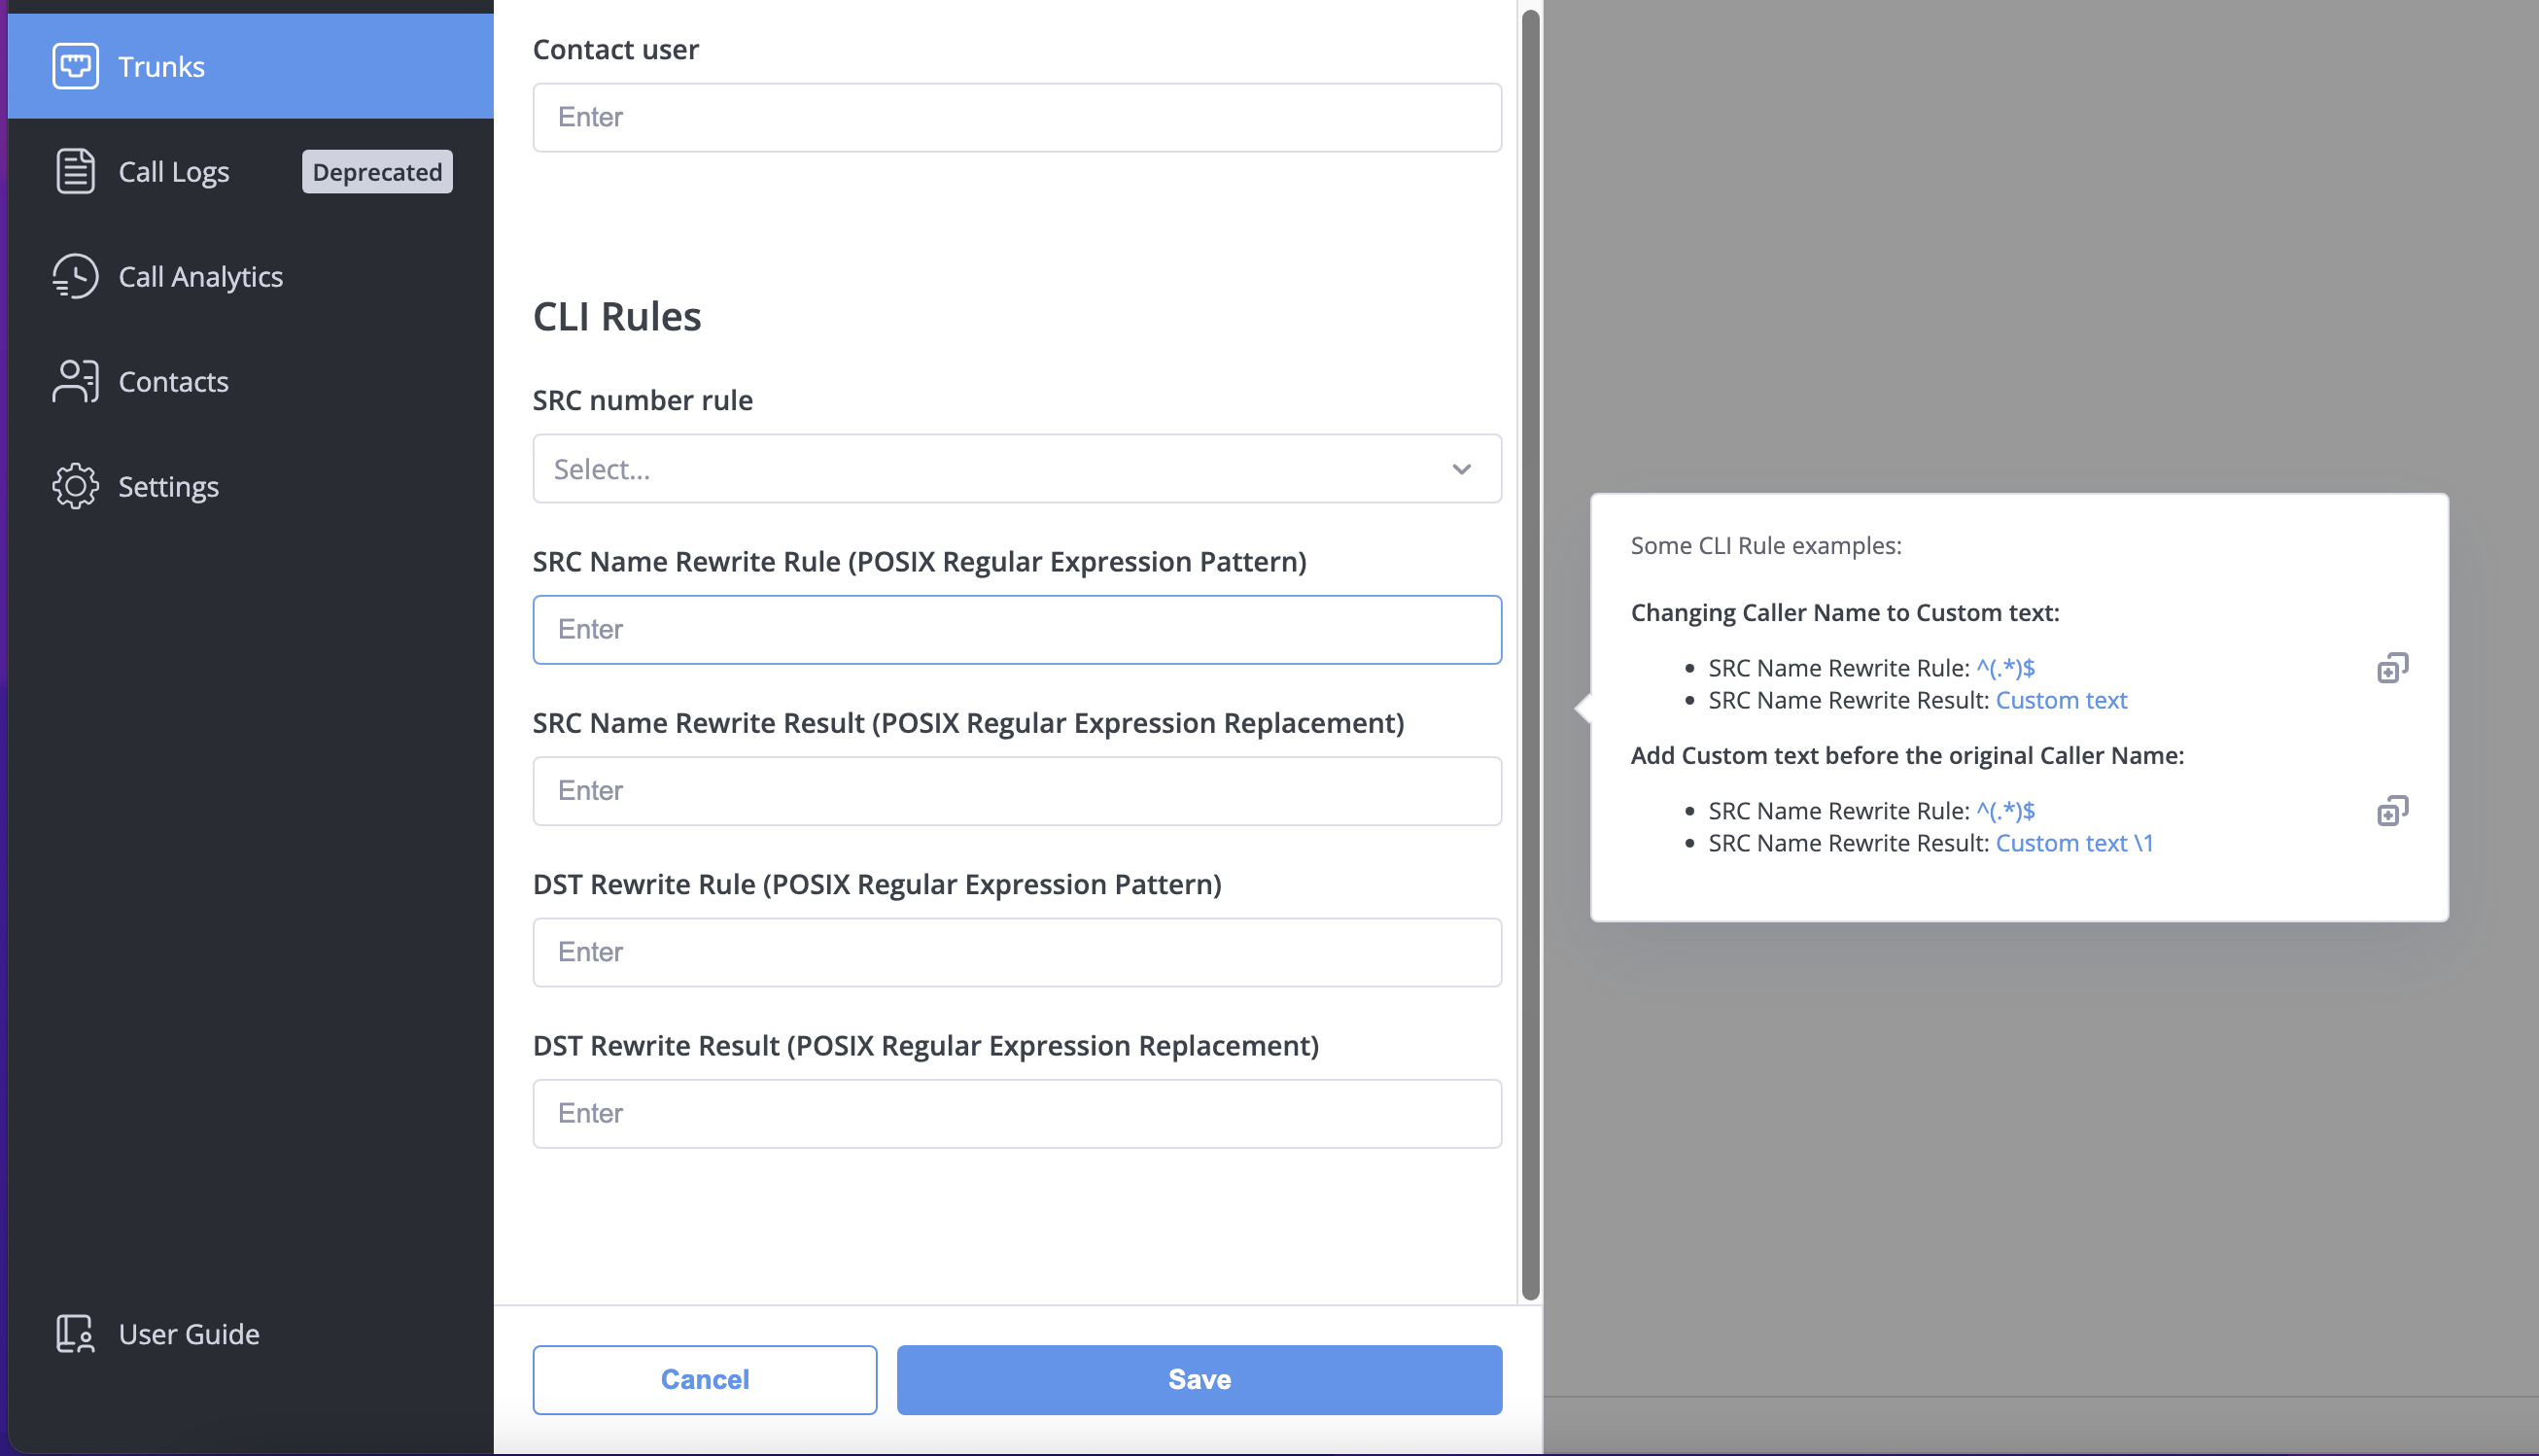
Modify caller information as calls arrive:
- Change caller names (e.g., add "External: " prefix)
- Reformat numbers (e.g., strip country codes)
Rules use POSIX Regular Expressions. See Understanding Regular Expressions below.
Termination Gateways
Termination gateways connect your system to external providers for outbound calls.
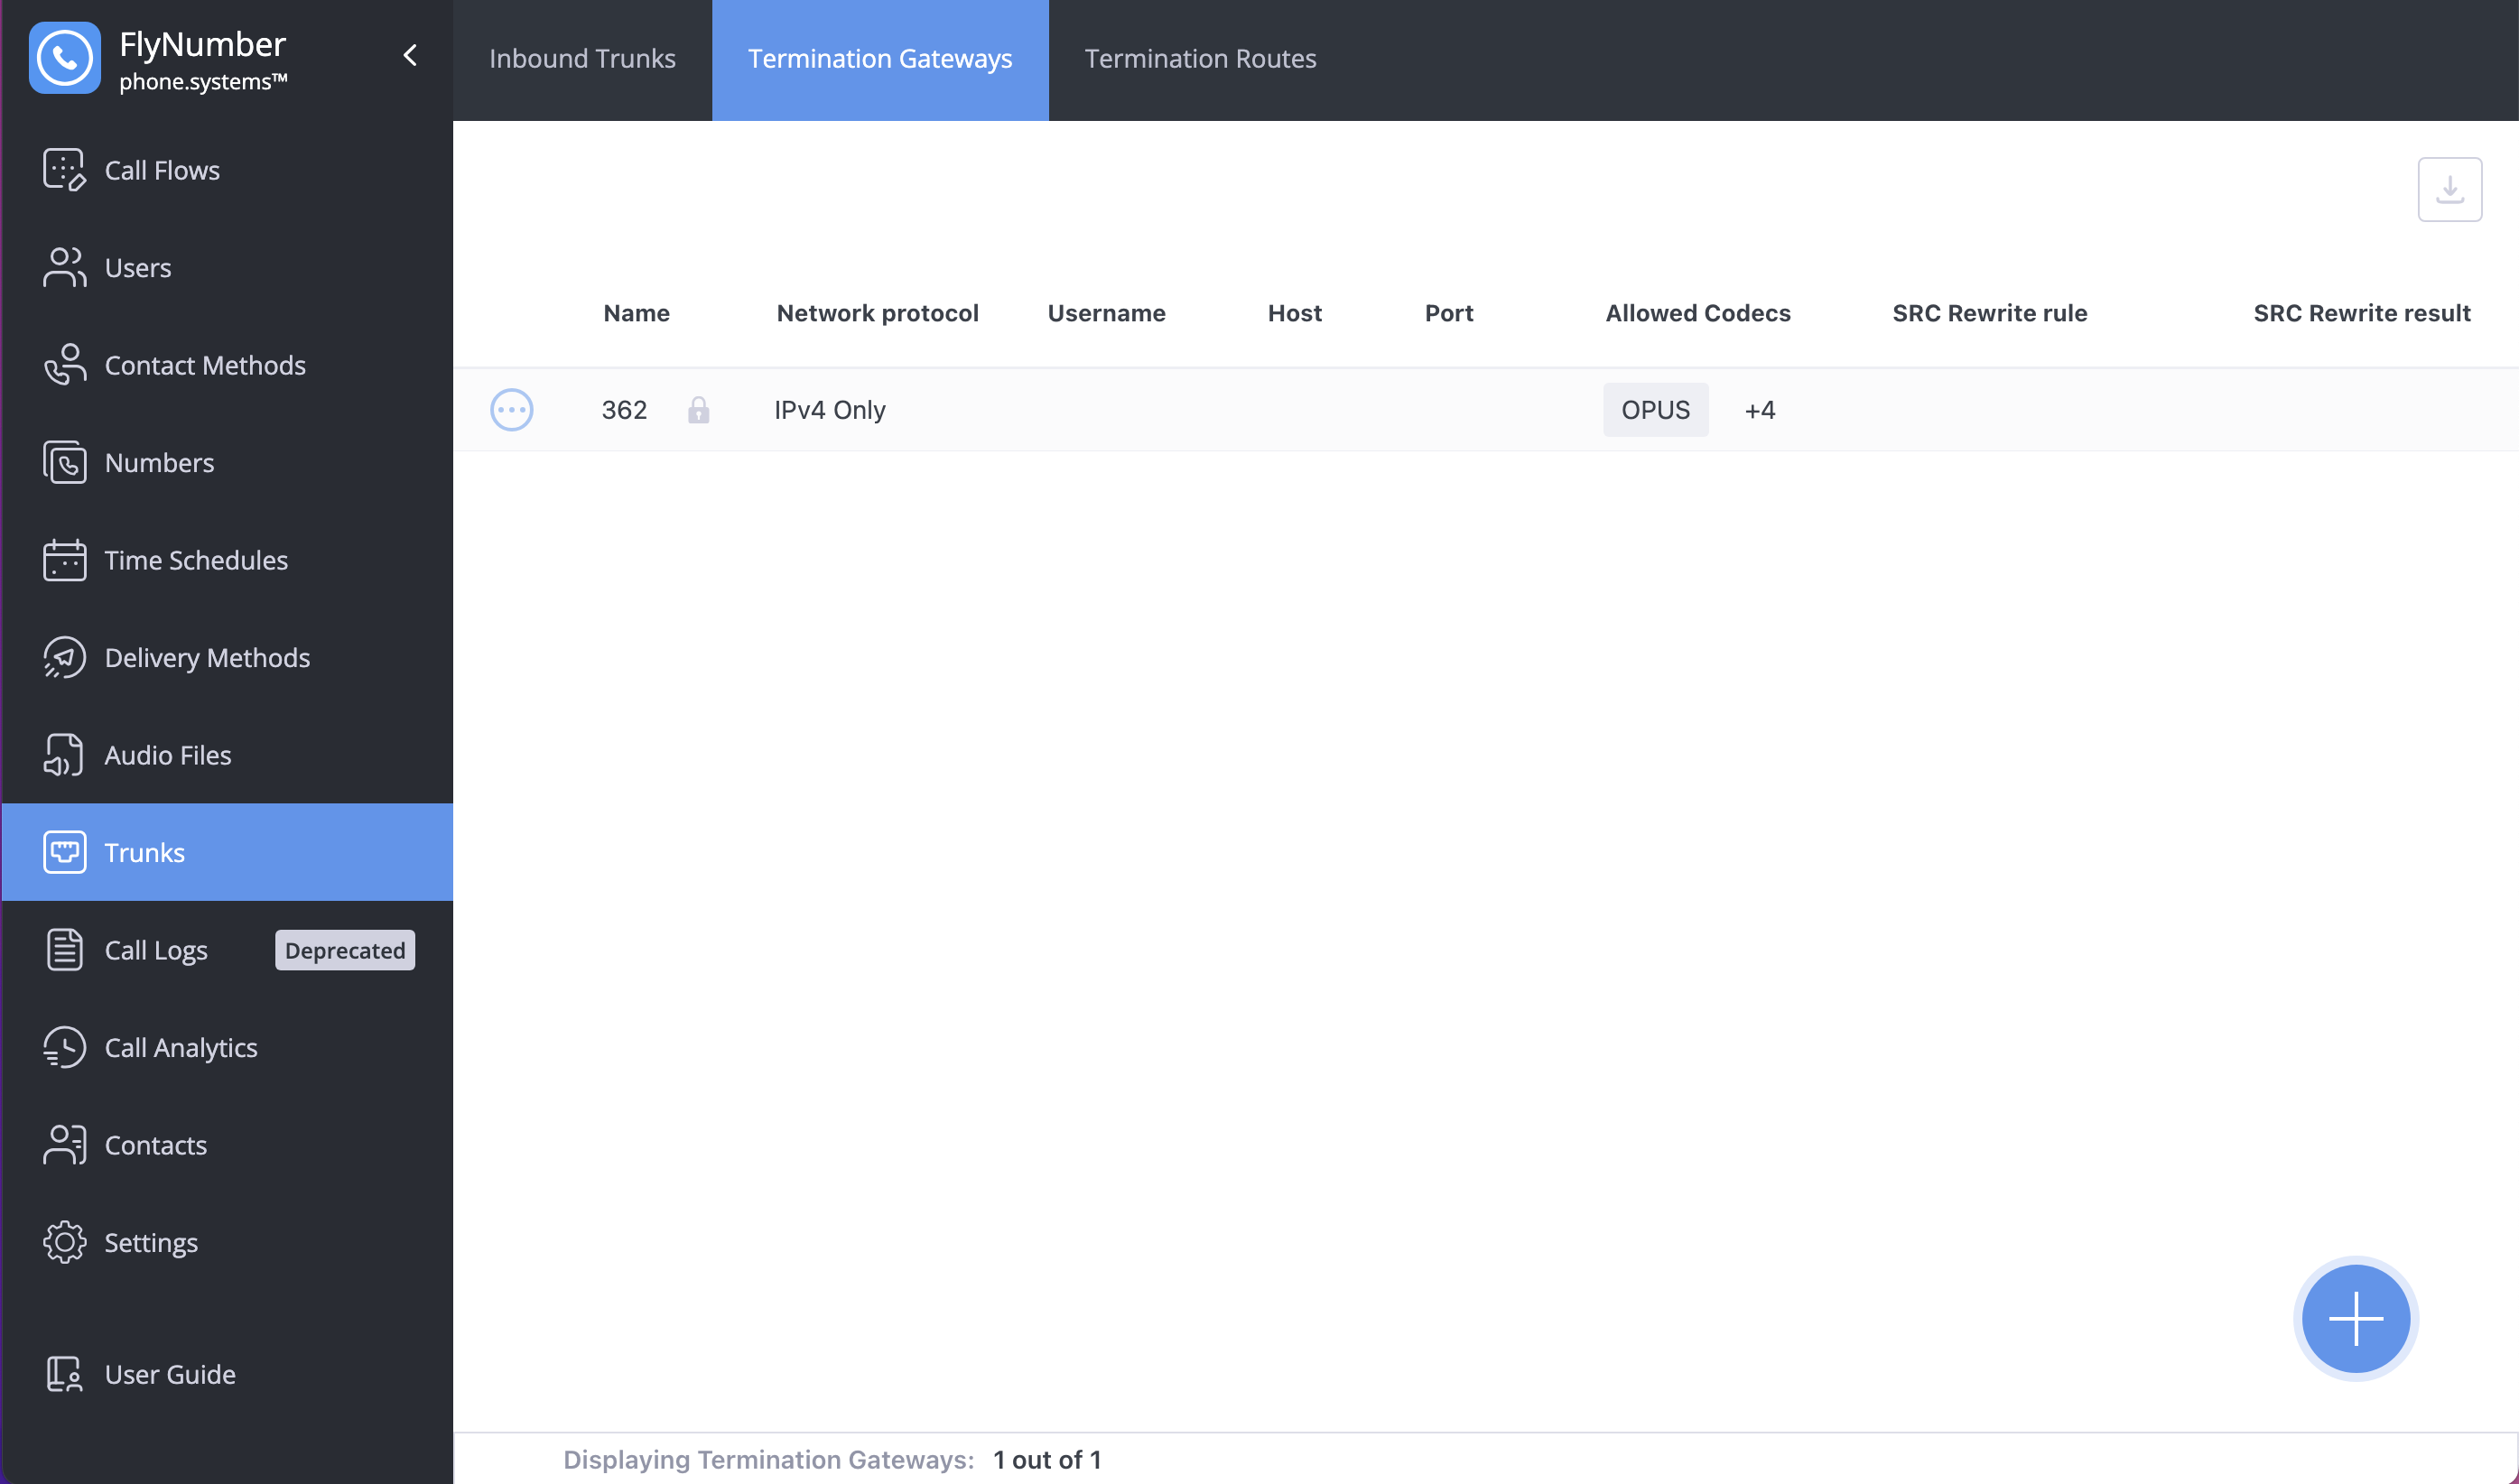
Creating a Termination Gateway
- Navigate to Trunks > Termination Gateways
- Click the + button
- Configure settings:
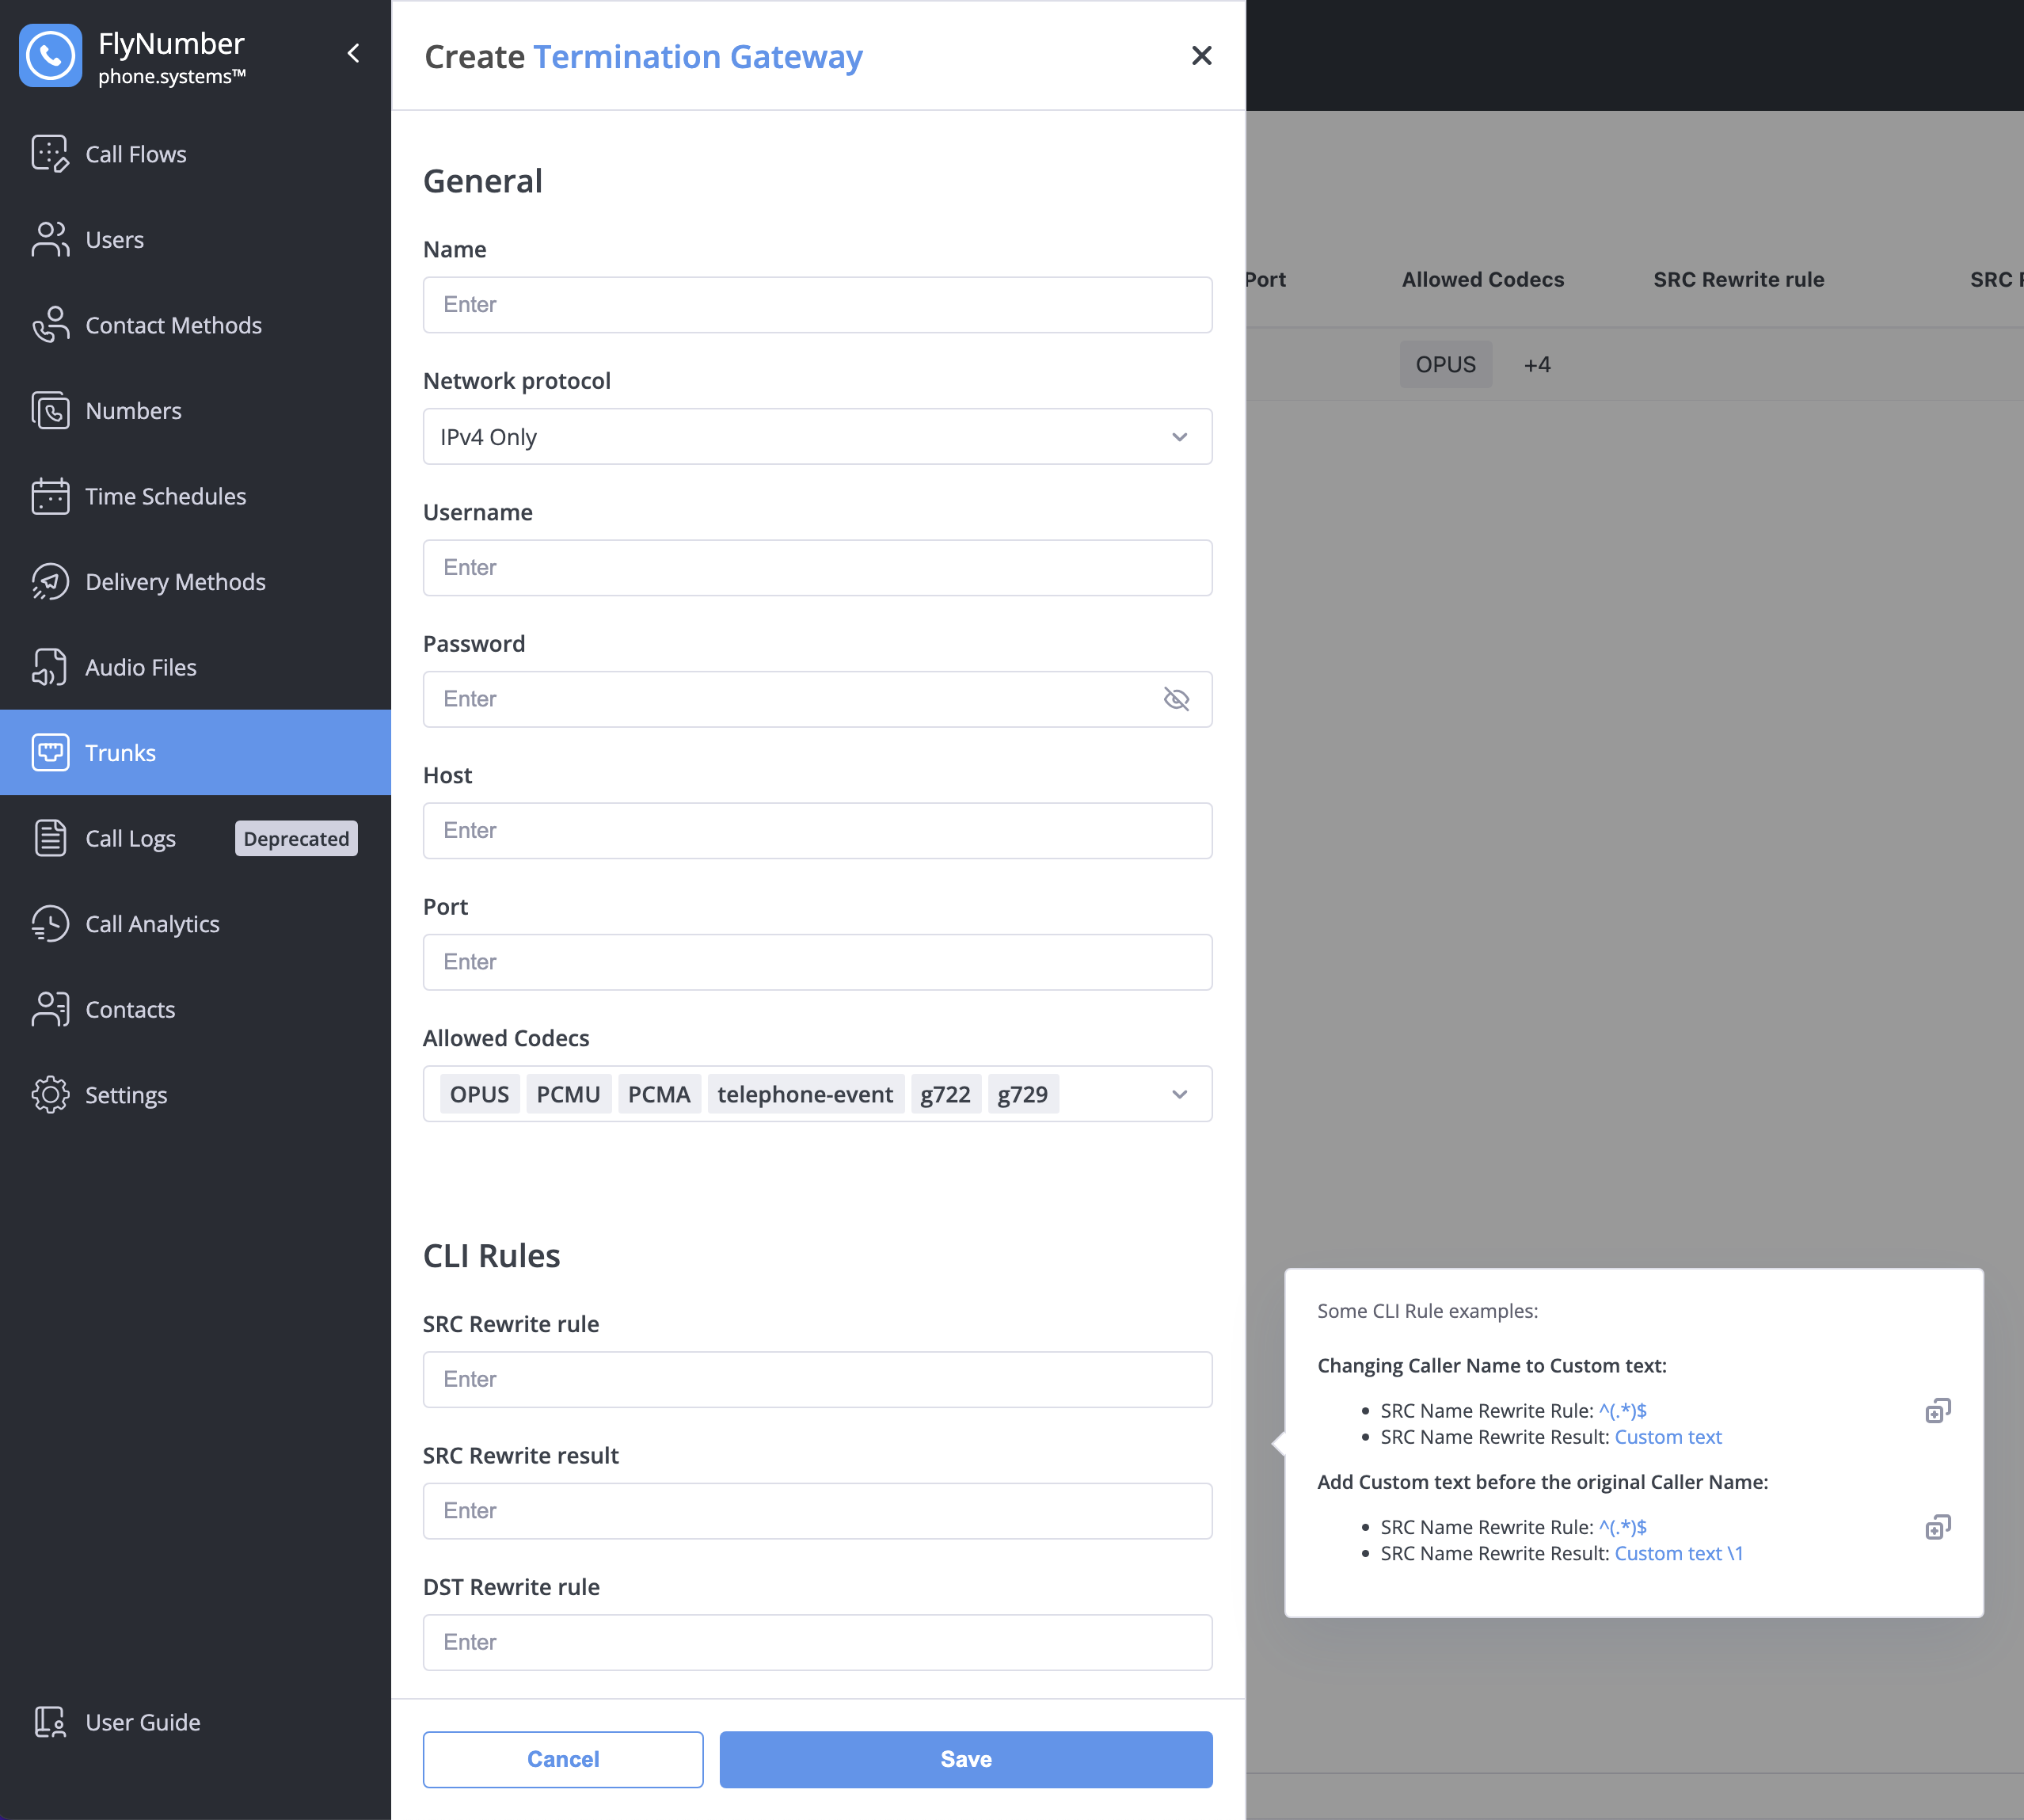
| Setting | Description | Example |
|---|---|---|
| Name | Friendly name | "Main Provider" |
| Network Protocol | Usually IPv4 Only | IPv4 Only |
| Username | Auth username from provider | your_username |
| Password | Auth password from provider | ••••••• |
| Host | Provider's SIP server | sip.provider.com |
| Port | Connection port | 5060 (UDP/TCP) or 5061 (TLS) |
| Allowed Codecs | Audio formats | OPUS, G722, PCMU, etc. |
- OPUS: Highest quality, more bandwidth
- G722: HD voice quality
- PCMU/PCMA: Standard quality, widely supported
- G729: Lower bandwidth, slightly lower quality
- Always include telephone-event for DTMF tones
CLI Rules for Gateways
| Rule | Purpose |
|---|---|
| SRC Rewrite | Modify outbound caller ID |
| DST Rewrite | Reformat destination number |
Useful for adding/removing country codes or presenting specific caller IDs.
Termination Routes
Routes determine which gateway handles each outbound call based on number patterns.
Creating a gateway isn't enough—you must also create routes that tell the system when to use it. Without routes, calls use the default gateway.
Creating a Termination Route
- Navigate to Trunks > Termination Routes
- Click the + button
- Configure settings:
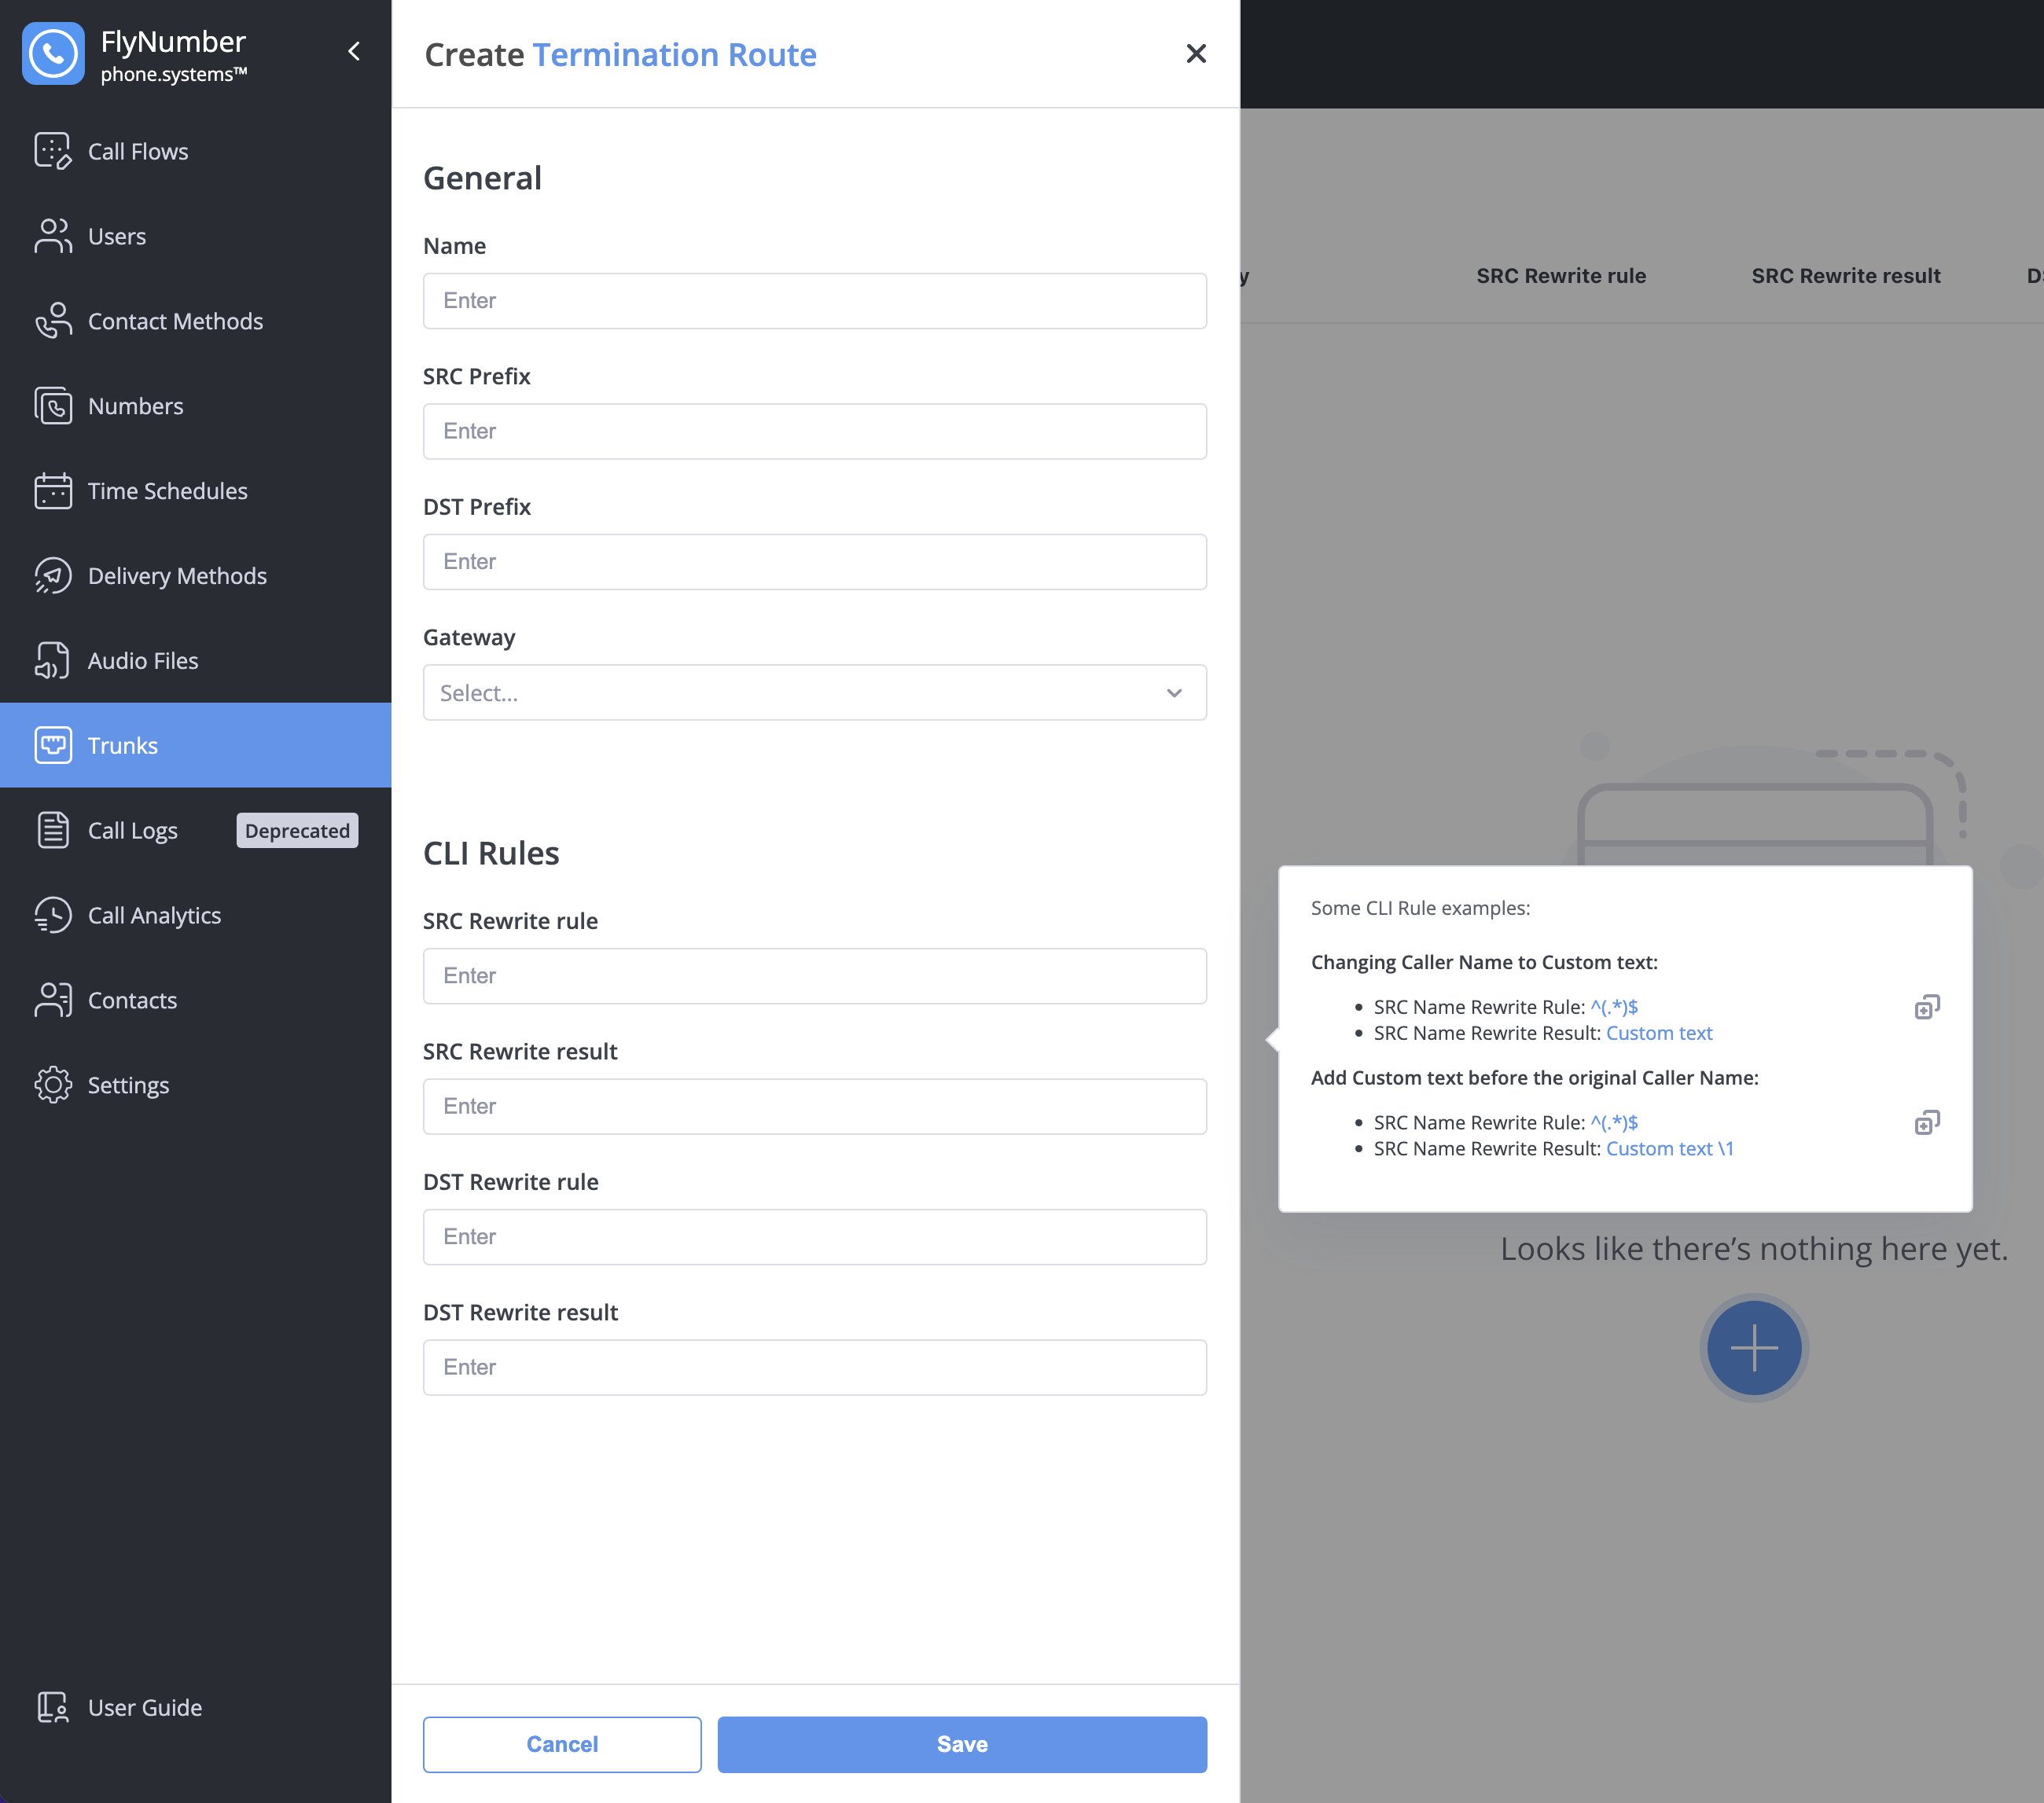
| Setting | Description |
|---|---|
| Name | Friendly name (e.g., "International Calls") |
| SRC Prefix | Match calls FROM numbers starting with this (optional) |
| DST Prefix | Match calls TO numbers starting with this (optional) |
| Gateway | Which gateway to use |
Route Priority
More specific routes take precedence:
| Priority | Configuration | Example |
|---|---|---|
| Highest | Both SRC and DST set | From +1555 to +44 |
| Medium | Only DST set | To +44 (any source) |
| Lower | Only SRC set | From +1555 (any destination) |
| Lowest | Neither set | Catch-all |
Tip: Longer prefixes beat shorter ones (+44207 beats +44).
Common Route Configurations
Route all calls through custom gateway:
- SRC Prefix: (empty)
- DST Prefix: (empty)
- Gateway: Your custom gateway
Route UK calls through custom gateway:
- SRC Prefix: (empty)
- DST Prefix: +44
- Gateway: Your UK provider
Route calls from specific DID:
- SRC Prefix: +15551234567
- DST Prefix: (empty)
- Gateway: Your custom gateway
Troubleshooting
| Problem | Likely Cause | Solution |
|---|---|---|
| Calls don't connect | Wrong gateway credentials | Verify username/password with provider |
| Registration fails | Network/firewall issue | Check connectivity to provider's server |
| One-way audio | Codec mismatch or firewall | Try different codecs; open RTP ports |
| Wrong caller ID | CLI rules needed | Add SRC Rewrite rule |
| Number format rejected | Provider expects different format | Add DST Rewrite to format numbers |
Reference
Understanding Regular Expressions
CLI rules use POSIX Regular Expressions:
| Pattern | Meaning |
|---|---|
^ | Start of string |
$ | End of string |
. | Any character |
\d | Any digit |
* | Zero or more of previous |
+ | One or more of previous |
() | Capture group |
\1 | First captured group (in replacement) |
Example: Add "+1" to 10-digit US numbers:
- Pattern:
^(\d{10})$ - Replacement:
+1\1
Inbound Trunk Use Cases
| Use Case | Description |
|---|---|
| Multi-Provider Integration | Route numbers from various providers to one system |
| Legacy Migration | Gradually move from old phone systems |
| Geographic Presence | Maintain local numbers from different regions |
| Redundancy | Backup call paths for reliability |
Outbound Route Use Cases
| Use Case | How to Configure |
|---|---|
| Cost Savings | Route by destination country to cheapest providers |
| Quality Control | Premium gateway for important calls |
| Local Presence | Present local caller IDs per region |
| Failover | Multiple routes to different gateways |
Getting Help
If you need assistance:
- Open a support ticket with FlyNumber
- Have your provider's documentation ready
- Include (non-sensitive) details about your setup
Some VoIP providers have specific FlyNumber integration guides—ask your provider if one is available.