How to set up making and receiving calls with your virtual number
Note: We have since added documentation, check out the phone system docs on setting up an app for the easiest way to get started.
You have a phone number, now you want to use it. Here we'll discuss getting incoming /outgoing calls on your smartphone with a virtual number (sometimes called a VOIP or DID number).
This guide assumes you have:
- A smartphone ( iPhone or Android)
- A FlyNumber account (https://www.flynumber.com) with the optional phone system
- Decent internet, wifi, 3G/4G and above should work well.
You'll need a SIP app, which is basically a program you download on your smartphone that allows for "SIP credentials" from any VoIP ( internet phone company ) to be entered into it. Once those credentials are entered into the app, the app can make and receive calls using said companies infrastructure. ( their phone numbers etc. )
Any "SIP app" works but here we'll show you examples on 2 different apps Groundwire and Zoiper , one paid and one free, respectively. ( Both apps are available for Apple and Android )
Step 1. Get SIP credentials from the phone system
Open your Phone System panel after you login. Click the "Phone System V2" button.

Drag the "Phone number" and "Ring Group" modules onto the grid like so
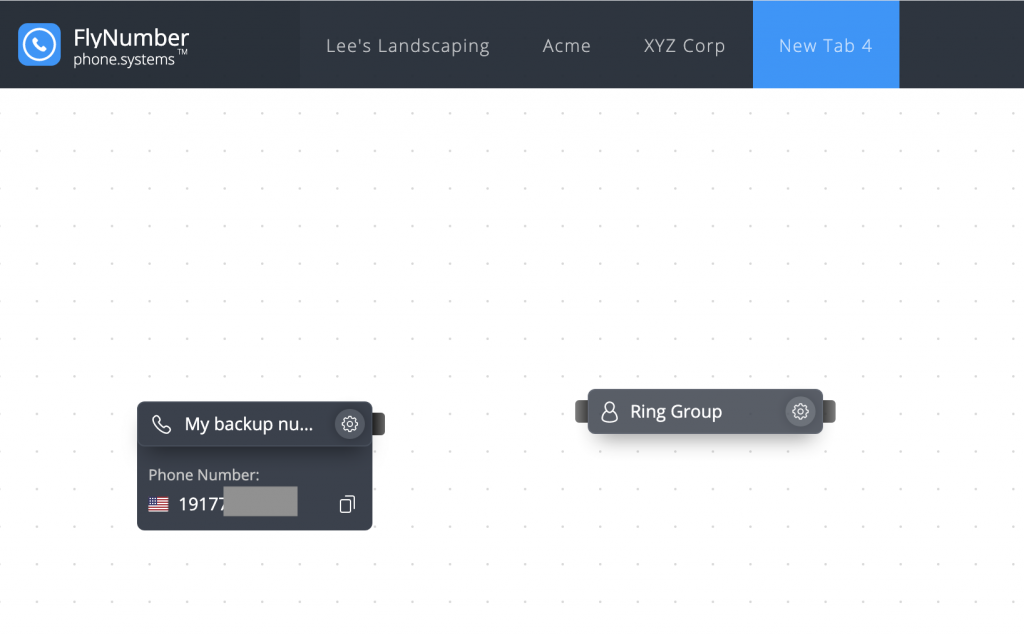
Once you drag the "ring group" module onto the grid it will ask you to set it up. As a "contact method" you'll want to choose "SIP Account ".
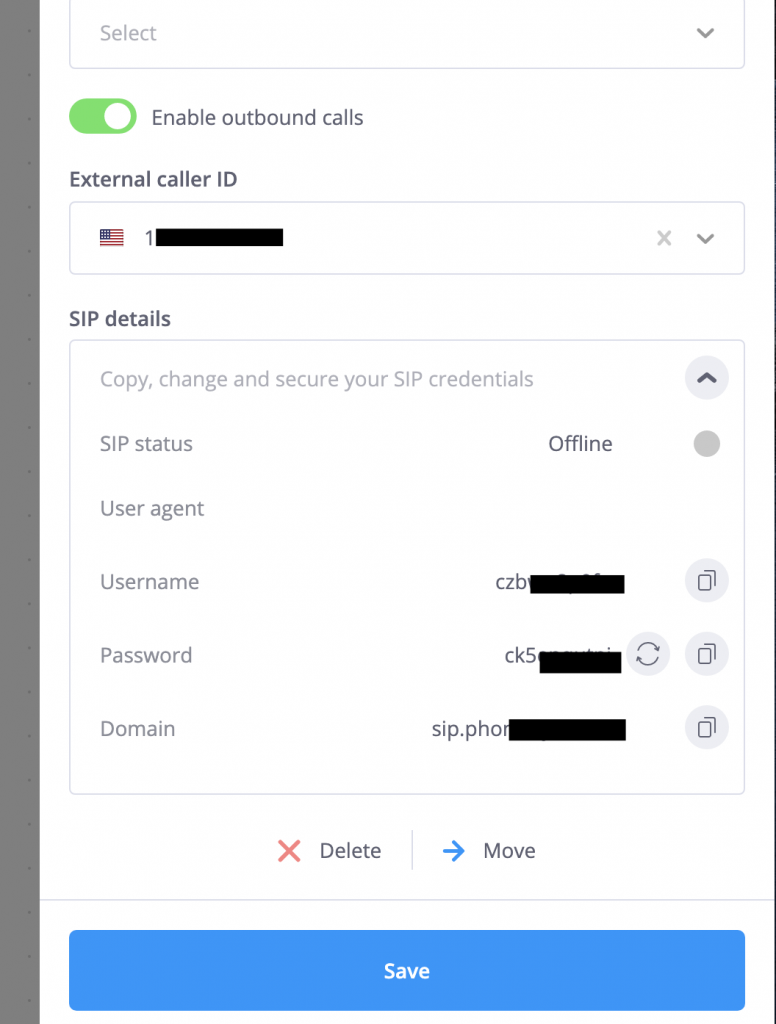
You'll eventually get to this screen, this is the information you need to enter into the SIP app.
2. Enter the SIP credentials into the application (Groundwire or Zoiper)
For zoiper: free
- Click the + on the top right to add an "account" ( which are the SIP credentials we set up earlier on the FlyNumber phone system )
- Choose "Yes" to Do you have a username/password"
- Then choose " Manual configuration"
- and finally "SIP account"
That brings you to this screen
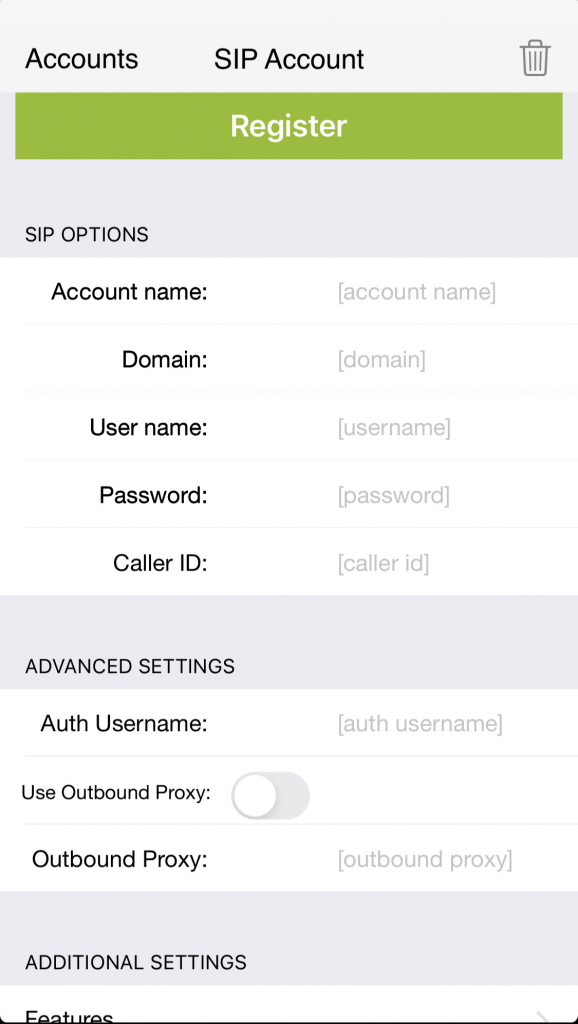
Enter the following:
Account name: Anything you want
Domain: sip.example.com ( also labeled "Domain" on the FlyNumber system)
User name: czbdsf53115 ( "Username" on FlyNumber)
Password: ck5ty68gd ( "Password" on FlyNumber and its case sensitive)
Other settings to look out for:
Under the "Additional Settings" for the "SIP Account" you'll see an option called "Network Settings "
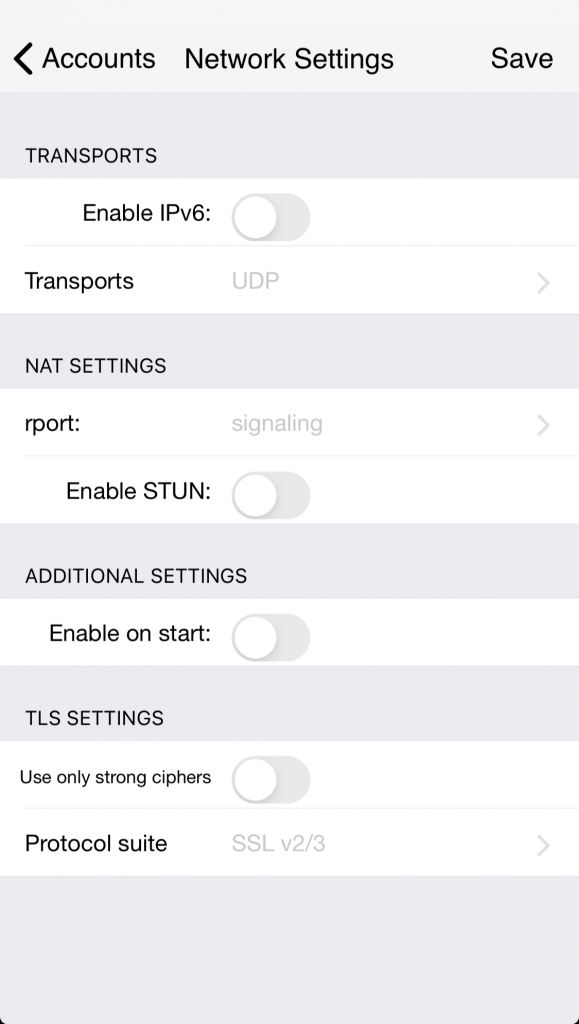
Make sure all those settings are disabled.
( the IPv6, STUN, TLS )
Under the "SIP Account" in "Additional Settings" you can also click "Audio codecs" if you'd like to adjust those although default should work OK
Here are the codecs we support:
- OPUS/48000/2
- G722/8000
- PCMU/8000
- PCMA/8000
- G729/8000
- GSM/8000
- telephone-event (for DTMF transport)
For Acrobits Groundwire: (paid but worth it)
This is a paid app and we highly recommend it. Once you've paid for the app you'll have the ability to answer calls with the app completely off ( not running in the background ). I personally have had it on my iPhone for years, never had an issue. (it's also available for Android )
Click the gear setting on the top right
Go to "Accounts"
Click the "+" on the top right
Add a "Generic SIP account"
You'll get to this screen
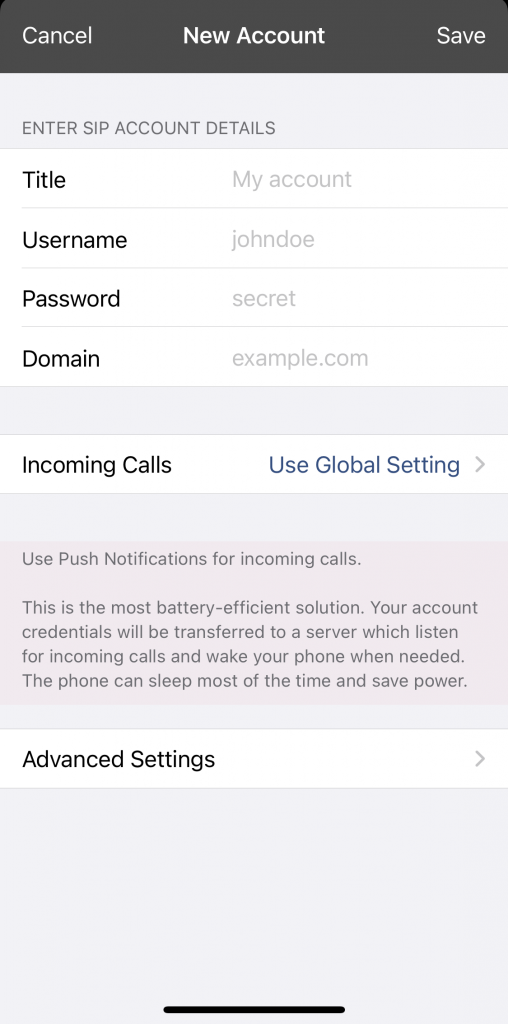
(pretty much just like the above app "zoiper"
Title: Anything you want
User name: czbdsf53115 ( "Username" on FlyNumber)
Password: ck5ty68gd ( "Password" on FlyNumber and its case sensitive)
Domain: sip.example.com ( also labeled "Domain" on the FlyNumber system)
Settings to look out for:
Under the "Account" on groudwire go to "Advanced Settings"
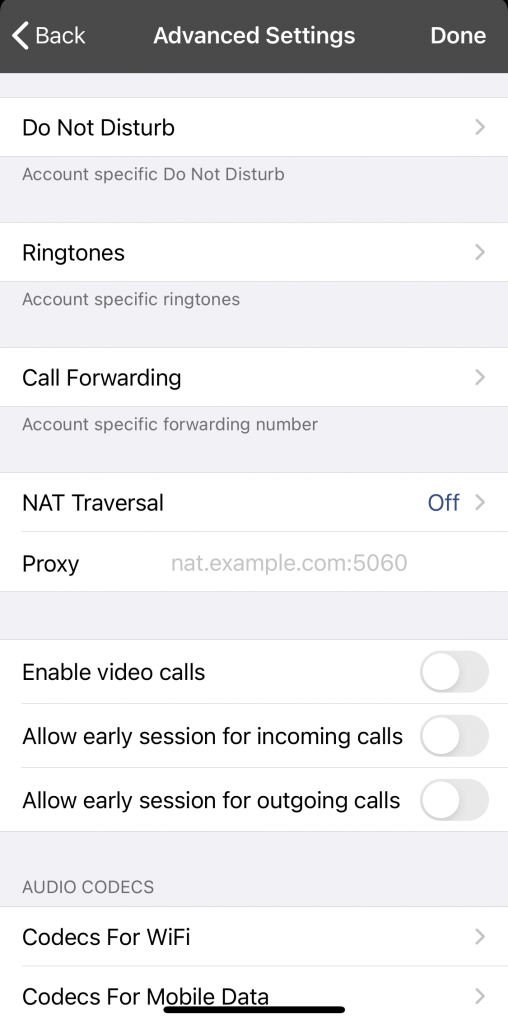
Make sure "NAT Traversal" is set to off
The phone system supports the following "codecs" , as you can see in the above screenshot you can change those settings for when udner wifi or mobile data. The default settings should be OK though.
- OPUS/48000/2
- G722/8000
- PCMU/8000
- PCMA/8000
- G729/8000
- GSM/8000
- telephone-event (for DTMF transport)
3. Make an outgoing call (or receive calls) and debug/troubleshoot
Your app should say "Registered " or "Connected", at this point calls from your FlyNumber will ring to the app. To call out please follow the format ( Country code + citycode + number )
For example, USA would be 19176282411 and for UK 442036031157
More details on the dial format here
Call History / Logs
The "Call logs" in our phone system are detailed and can help with issues and help with call tracking. Check them out for clues if you're having issues or let u know the responses there if submitting a support ticket.
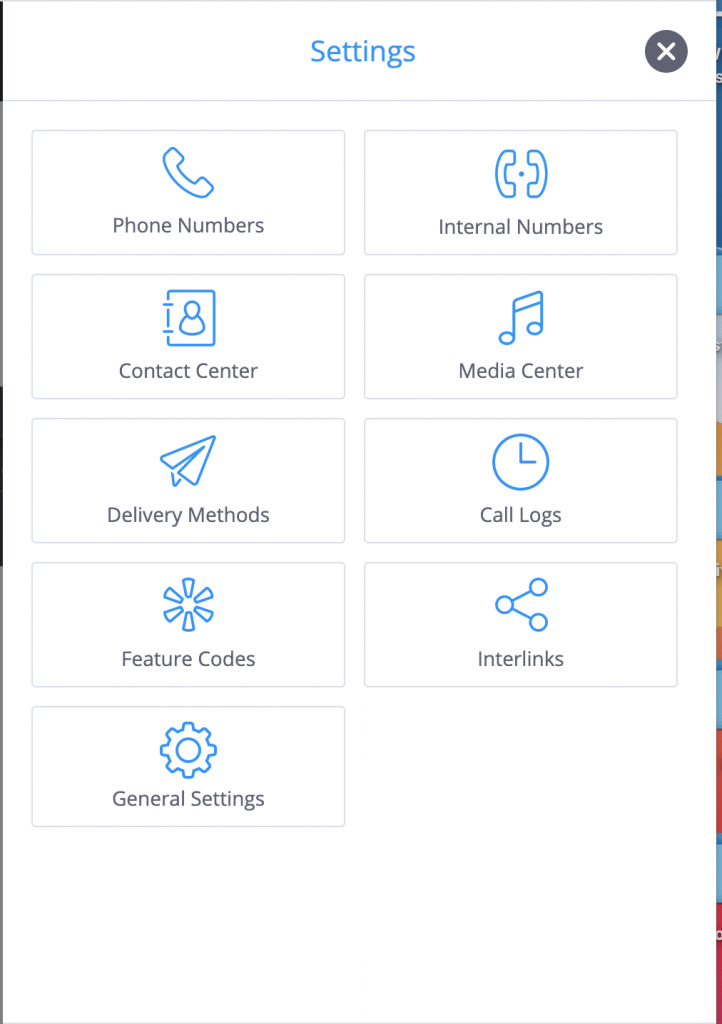
While at the phone system grid, click the 3 horizontal lines ( menu ) on the top right

Then click "Call Logs" in the settings screen ( as seen below)
Then click "Outbound or Inbound CDRs" to see the calls.
If you have any feedback or need assistance please let us know