Customize incoming caller ID
Introduction: The Power of Caller ID Customization
One of the standout features of our cloud phone system is the ability to edit the caller-ID for the phone receiving the FlyNumber calls (only when using VoIP). This comes in handy when you need to distinguish between calls coming in from different phone numbers.
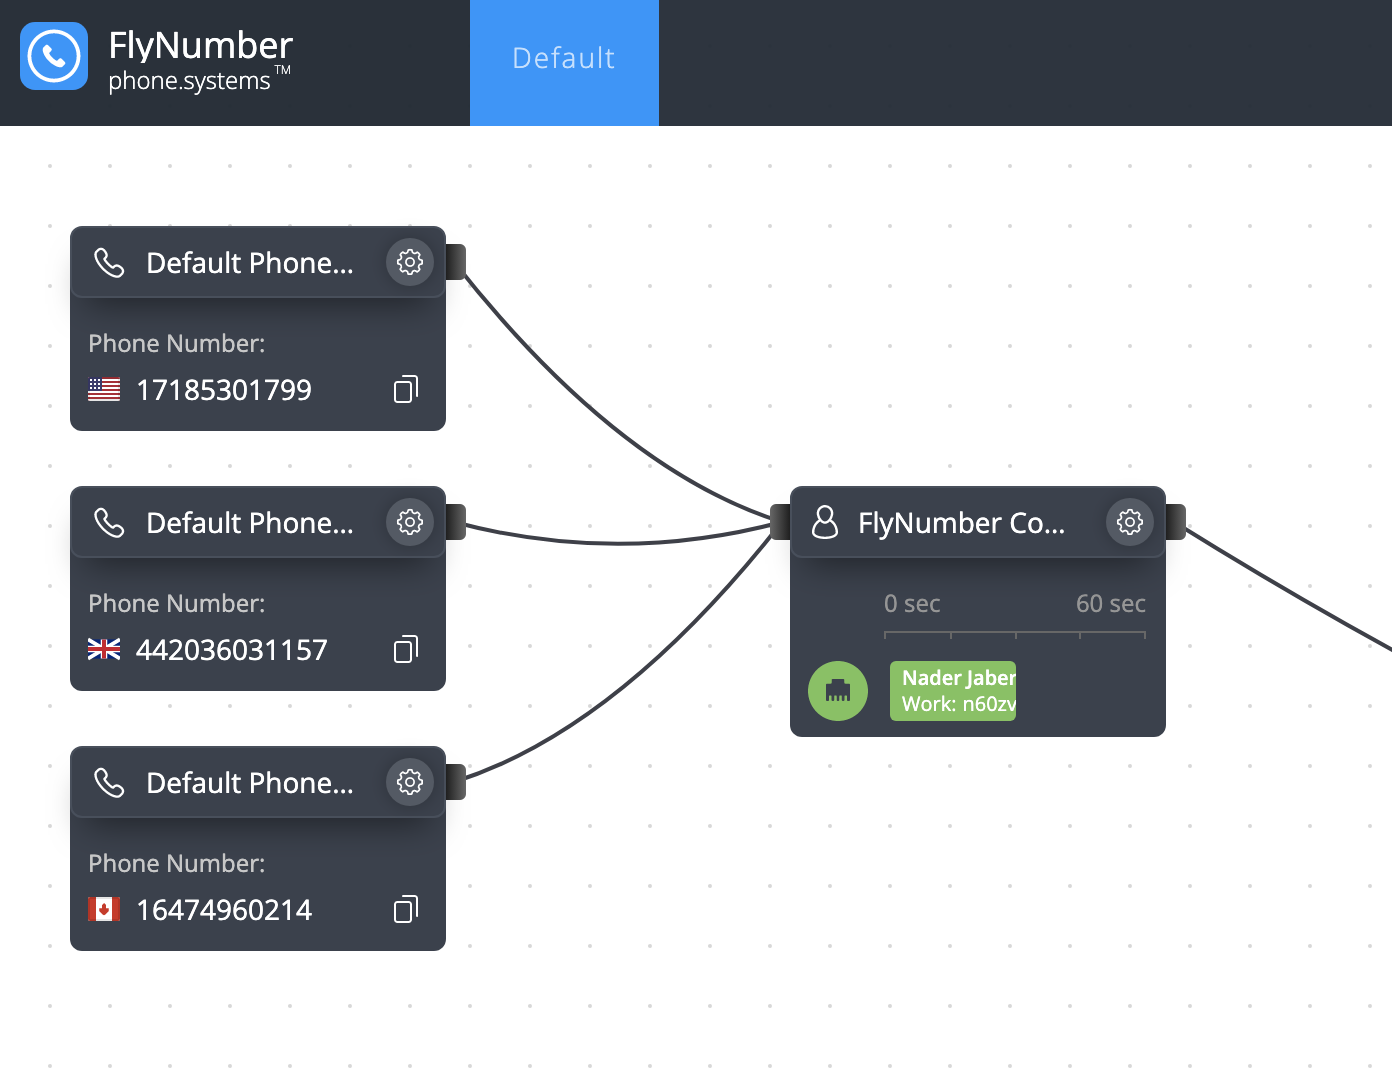
Imagine having a UK, Canada, and US FlyNumber ringing directly to your smartphone or a desktop VoIP phone (such as Grandstream or Yealink). By default, you'll see the caller-ID of the person calling the FlyNumber, but you won't know which FlyNumber they called.
Understanding Multi-Number Management
CLI Rules: Powerful Call Identification Tools
CLI (Caller Line Identification) Rules are used to override the Source Caller Name. When using VoIP, this powerful feature helps you distinguish between calls coming from different FlyNumbers. Here's what you can do with CLI rules:
- Add custom text before or after the Caller-ID
- Remove the caller ID entirely and replace it with any text
- Add or remove a "+" symbol from the caller ID
- Create matching patterns using regex (don't worry, we provide examples!)
CLI Rule Configuration Examples
-
Changing Caller Name to Custom Text:
SRC Name Rewrite Rule: ^(.*)$
SRC Name Rewrite Result: Custom text -
Adding Custom Text Before Original Caller Name:
SRC Name Rewrite Rule: ^(.*)$
SRC Name Rewrite Result: Custom text \1
Two Ways to Configure CLI Rules
1. Phone Number Module Configuration
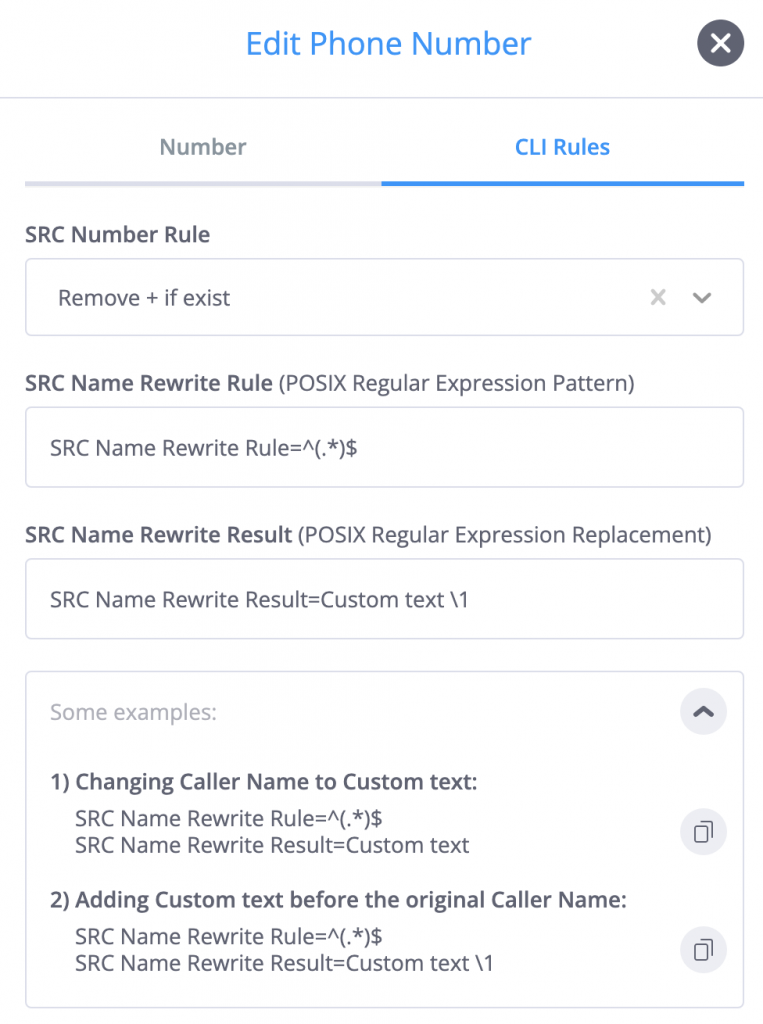
When you edit rules under the "Phone number" module, all calls from that specific FlyNumber will follow that rule, regardless of which VoIP client or phone receives the call. This setting is number-specific and applies globally to all calls from that number.
2. Ring Group Module Configuration
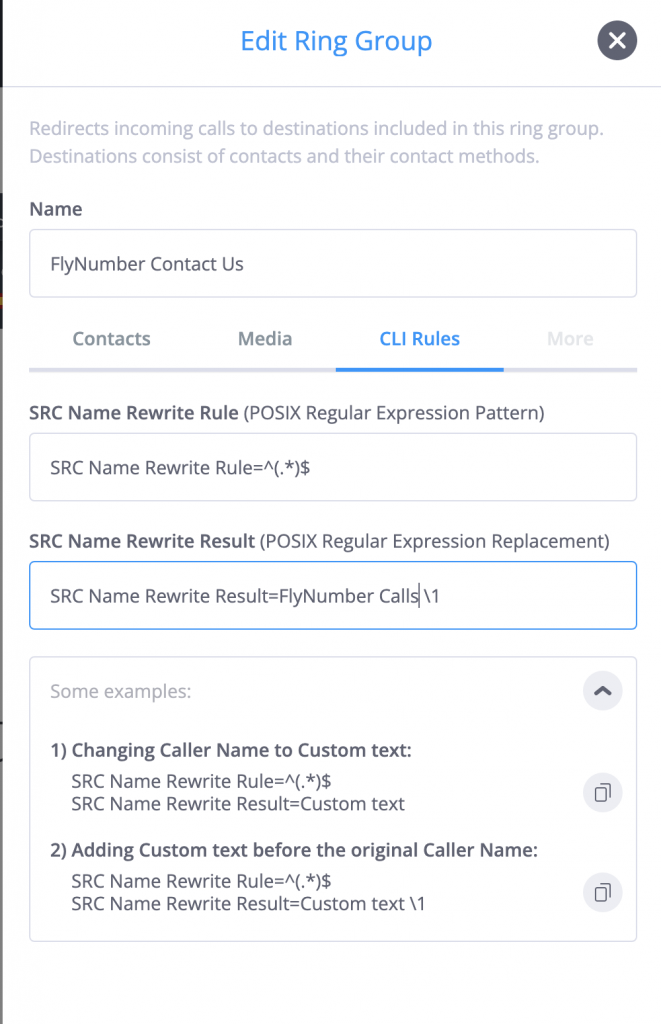
Ring group CLI rules apply only to devices within that specific group. This allows for more granular control. For example:
- John's ring group: Shows "Sales call - 212-555-1111"
- Sally's ring group: Shows "Support - 212-555-1111"
Practical Applications and Use Cases
1. Business Operations
- Business Differentiation: Identify department or branch (e.g., "Sales - US", "Support - UK")
- Personal and Work Separation: Distinguish between personal and work calls on the same device
2. Marketing and Customer Service
- Marketing Campaign Tracking: Label different advertising channels
- Customer Segmentation: Identify VIP customers or specific industries
- Language Support: Indicate caller's preferred language (e.g., "English Support", "Spanish Support")
3. Time-Based Management
- After-hours or Emergency Calls: Distinguish between regular business hours and urgent calls
- Time Zone Management: Identify calls from different geographic regions
Important Notes
- CLI Rules feature is disabled by default
- When enabled in the Phone Number module, rules apply to all calls from that number
- No technical expertise needed - we provide simple examples and patterns
If you have any questions feel free to comment below or post on our discussion forum.