Contact Methods Overview
The Contact Methods section is where you manage all the ways calls can be handled in your phone system. This includes:
- App configurations for the phone system app
- SIP accounts for VoIP phones and softphones
- PSTN forwarding for routing to regular phone numbers
- SIP forwarding for routing to external VoIP systems
- Email addresses for receiving voicemails and call recordings
Once a contact method is configured, it can work independently without using the panel modules. To set up the App as a contact method, you'll need to do this from the Users menu.
Routing Options
All contact methods (App Configurations, SIP Accounts, PSTN Forwarding, and SIP Forwarding) support two routing approaches:
| Option | Method | FlyNumber in Phone Number Module? | Custom Call Flows? |
|---|---|---|---|
| Direct Connection | Assign FlyNumber as DID Number | No | No |
| Call Flow Integration | Leave DID Number empty | Yes | Yes |
Direct Connection (Simple)
- Assign a FlyNumber as the DID Number in the contact method settings
- Calls ring directly to that contact method
- Your FlyNumber will NOT be available in the Phone Number module
- No panel-based call flow customization
Call Flow Integration (Advanced)
- Leave the DID Number field empty
- Use the Phone Number module with your FlyNumber
- Connect to a Ring Group that includes the contact method
- Full access to modules for building custom call flows
When you assign a FlyNumber as the "DID Number" in a contact method, that number becomes directly linked to that contact method. The FlyNumber will not be available in the Phone Number module for use in call flows.
Choose your configuration based on your needs:
- Simple routing: Assign the FlyNumber directly in a contact method
- Complex call flows: Keep the FlyNumber unassigned so you can use it in the Phone Number module
Common Inbound Settings
All contact methods (except email) share these common inbound call settings:
-
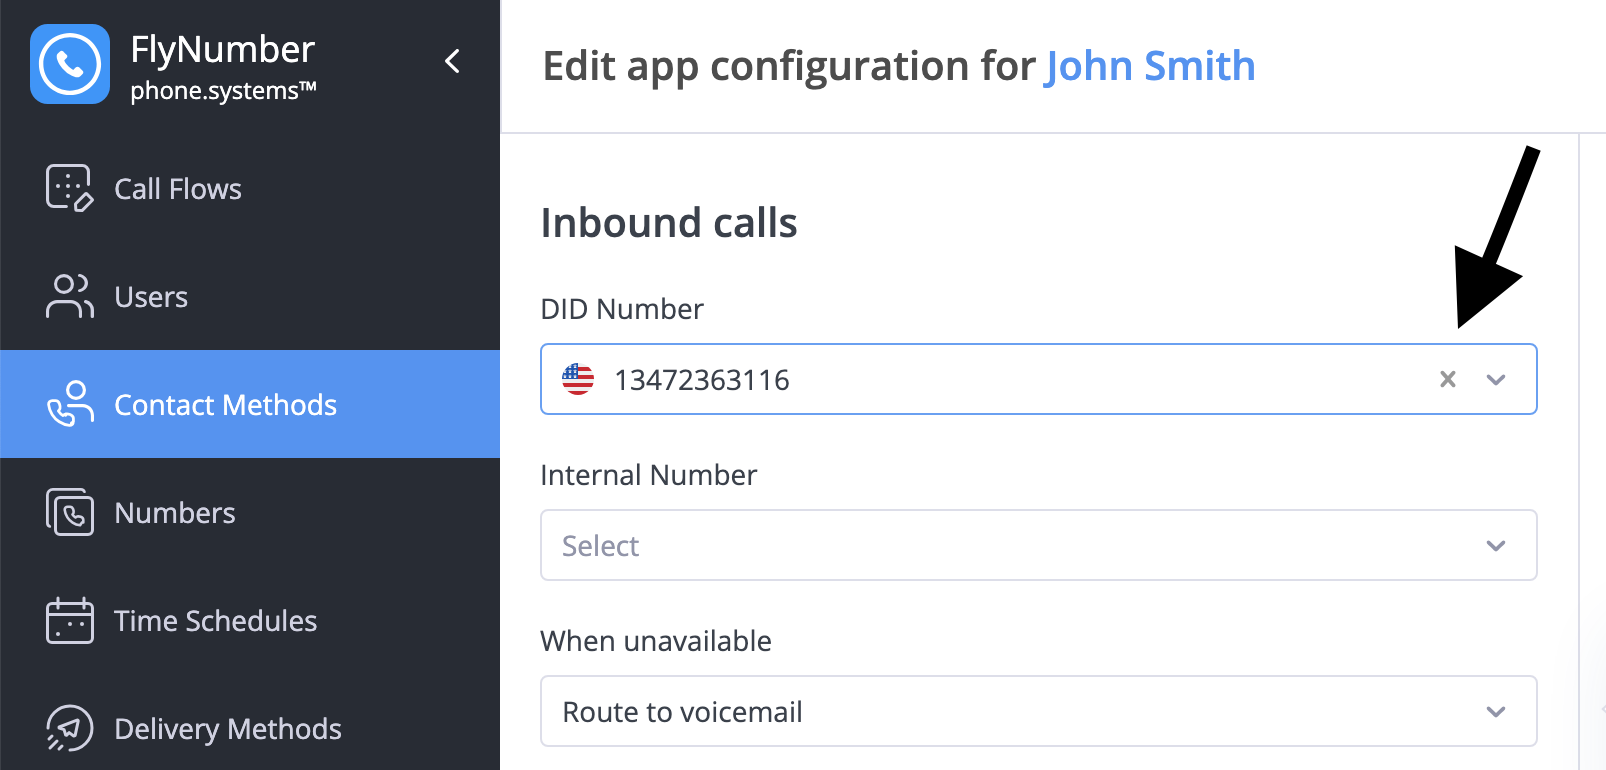
DID Number: Select which FlyNumber rings to this contact method
warningWhen you assign a FlyNumber here, it creates a direct connection. The number will NOT be available for use in the Phone Number module on the panel. Leave this field empty if you want to use the number in a call flow with modules.
-
Internal Number: Set an extension for internal calling
- 1-4 digit number
- Must be unique across your system
- Used for quick internal dialing
-
When unavailable: Choose what happens when calls can't be answered
- Do Nothing: End the call
- Route to Voicemail: Send to voicemail with selected greeting
- Custom handling options may vary by contact method type
-
Voicemail audio: Select greeting for voicemail (if enabled)
- Choose from your uploaded audio files
- Different greetings for different scenarios
Integration with Call Flows
All contact methods can be integrated into your call flows using the Ring Group module or Queue module. This allows you to:
- Create complex routing scenarios
- Combine with other call handling features
- Set up conditional routing
Ring Group Module: Best for 1-3 destinations with precise timing control (up to 60 seconds)
Queue Module: Required for 4+ destinations, supports unlimited team members with handling times up to 15 minutes
Need to route calls to multiple PSTN numbers or several SIP destinations? Use the Queue module for better scalability.
To integrate a contact method into your custom call flow:
- Clear the DID Number from the contact method's inbound settings (this frees up your FlyNumber)
- Use a Phone Number module with your FlyNumber connected to a Ring Group
- Add the contact method as a destination in the Ring Group
This approach gives you the flexibility to create complex call handling while still using your preferred contact methods as destinations.
You can enhance your call flow by adding other modules like:
- Time Router for schedule-based routing
- Voice Menu for interactive menus
- Other modules to build complex call flows
Call Transfers
Call transfer functionality allows users to transfer calls to other numbers using feature codes. This applies to both SIP Accounts and PSTN Forwarding. When "Allow Call Transfer" is enabled in the contact method settings, users can perform call transfers during a call.
To configure call transfers:
- Enable Allow Call Transfer in the settings of your SIP Account or PSTN Forwarding
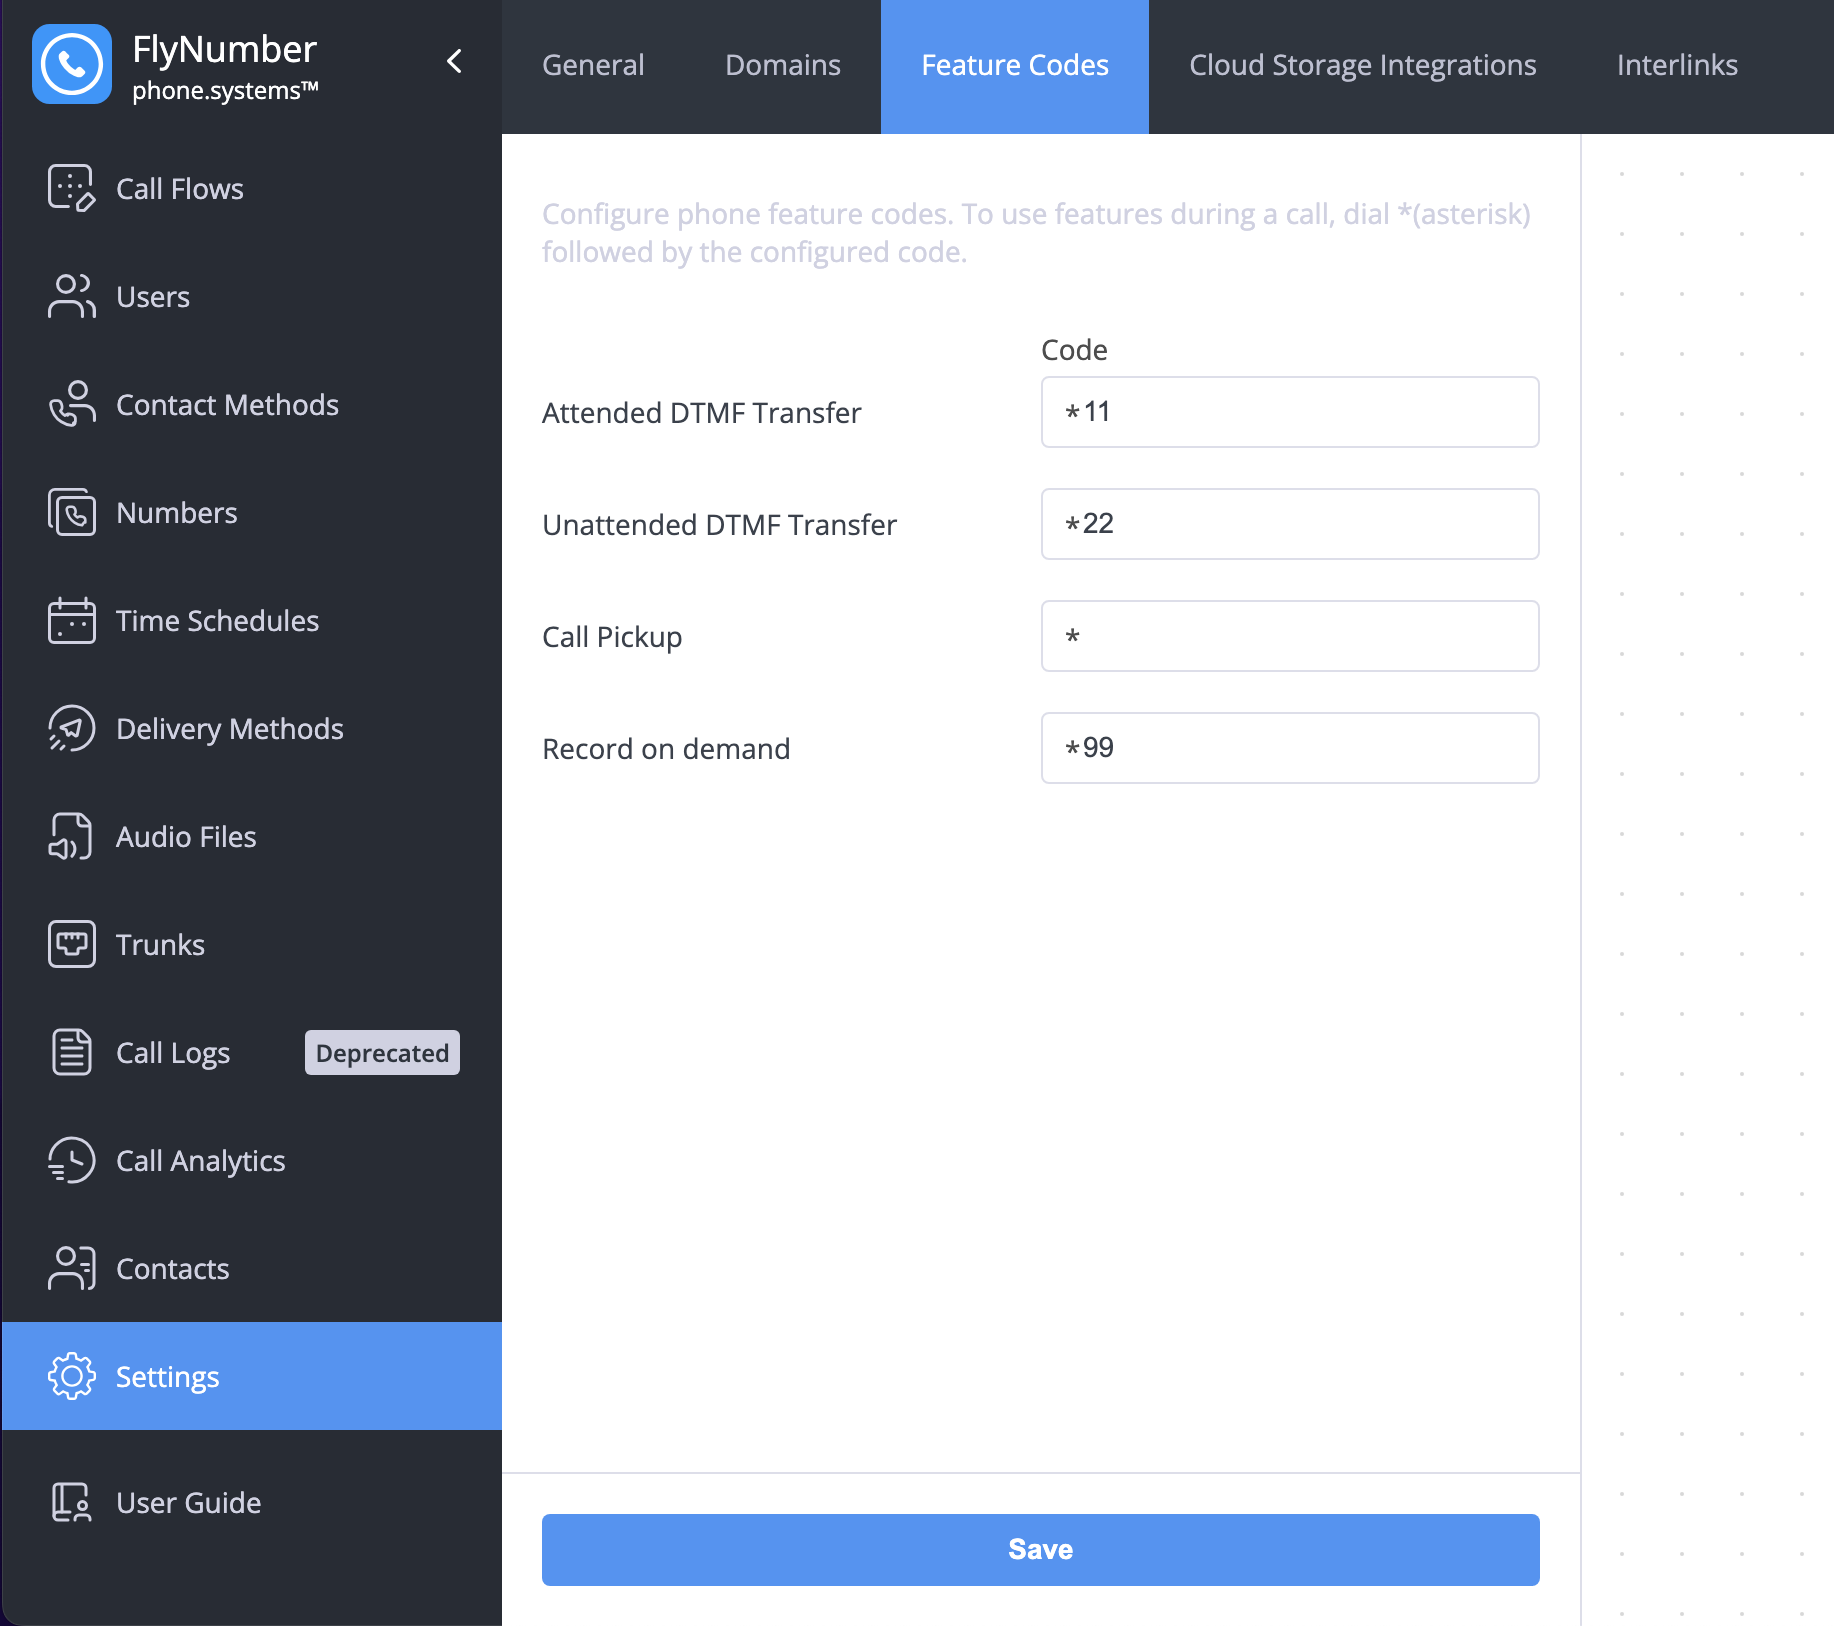
- Ensure the appropriate feature codes are set up in Settings > Feature Codes
There are two types of transfers available:
Attended Transfer
- Press *11 during the call (using our example)
- Enter the destination number in E.164 format (without +) followed by #
- The system announces "Transfer"
- Speak with the new recipient first
- Complete the transfer after confirmation
- Return to the original caller if needed
Perfect for when you need to:
- Confirm recipient availability
- Provide context before transfer
- Ensure a proper handoff
Unattended Transfer
- Press *22 during the call (using our example)
- Enter the destination number in E.164 format (without +) followed by #
- The system announces "Transfer"
- The call transfers immediately
- The original caller connects directly to the destination
Ideal for:
- Quick transfers
- Known recipients
- Routine call routing
Enabling call transfers may incur additional per-minute charges for the transferred calls — see the per-minute rates page for current pricing.
Call Recording Configuration
Contact methods that support calls (App Configurations and SIP Accounts) share the same recording options.
Delivery Methods
Choose where recordings are sent:
- Dropbox
- FTP
- SFTP
- Google Drive
- OneDrive
- Cloud Storage
Call Types to Record
Configure which calls to record:
- Inbound Internal
- Inbound External
- Outbound Internal
- Outbound External
Record on Demand
Enable manual recording during calls using feature codes configured in Settings > Feature Codes.
Call recordings are:
- Sent immediately after each call ends
- Not stored on phone system servers
- Subject to email server file size limits (approximately 7MB per hour)
In addition to the standard delivery methods, you can configure cloud storage integration (AWS, Azure, or MinIO) through Settings > Cloud Storage Integrations. This provides an alternative way to store and manage your recordings.